The coveted ‘medium-format look’ is not an intangible magic, but the direct result of superior data acquisition and optical physics.
- Larger sensors necessitate longer focal lengths for equivalent views, creating a unique depth-of-field compression and a more gradual tonal falloff.
- True 16-bit color depth provides exponential gains in tonal information, eliminating banding and allowing for unprecedented flexibility in post-production.
Recommendation: For the discerning photographer, the choice is not about more megapixels, but about investing in a system that captures a more profound and malleable version of reality from the outset.
For any photographer who has spent years honing their craft, there comes a moment of quiet contemplation in front of an image that simply feels different. It possesses a dimensionality, a subtle transition from focus to blur, and a richness of tone that seems to defy the technical specifications of their own trusted equipment. This is often the first encounter with the ‘medium-format look’—an elusive quality that inspires both aspiration and a significant financial question: is it worth the investment?
The common discourse often simplifies the answer, attributing this look to platitudes like “more megapixels” or a “shallower depth of field.” While these elements play a role, they are merely symptoms of a much deeper cause. They fail to explain the fundamental principles at work, leaving the photographer with a romantic notion rather than a qualitative understanding. This incomplete picture is insufficient when considering an investment that can easily exceed that of a small car.
The truth is far more fascinating. The medium-format look is not an accident of magic but a deliberate outcome of physics and data science. It is born from the interplay between a larger sensor surface, the specific optical formulas required to service it, and the sheer volume of color information captured in every single file. It is a philosophy of image-making built on capturing superior data from the very beginning, rather than attempting to reconstruct it later in software.
This analysis will deconstruct that very philosophy. We will move beyond the myths to explore the tangible, technical underpinnings of this distinct aesthetic. We will examine how the falloff gradient is rendered, how 16-bit files create immense tonal headroom, and why not all lenses are created equal in the face of 100 megapixels. This is a guide for the photographer ready to graduate from appreciating the look to truly understanding its origin.
This article provides a structured breakdown of the key technical pillars that constitute the medium-format advantage. The following table of contents outlines our journey from the physics of light to the practicalities of post-production.
Table of Contents: Deconstructing the Elements of the Medium-Format Look
- Why Does the Transition from Sharp to Blur Feel Different?
- How to Push 16-Bit Files in Post Without Banding?
- Autofocus Speed vs. Image Quality: Is the Trade-off Worth It?
- The Mirror Slap Mistake That Ruins Medium Format Resolution
- Which Lenses Can Actually Resolve 100 Megapixels?
- Why Does a 40-Megapixel Image Look Soft at 2 Meters Wide?
- Why Does Sensor Size Actually Affect Depth of Field?
- How to Capture High Dynamic Range Scenes Without the “Fake HDR” Look?
Why Does the Transition from Sharp to Blur Feel Different?
The quality of out-of-focus rendering, or bokeh, is often discussed subjectively. However, the distinct character of medium format’s transition from sharp to blur is grounded in optical physics. The term we can use is the falloff gradient: it describes not just the amount of blur, but the quality and speed of the transition. On a larger sensor, this gradient is often perceived as more gradual, more three-dimensional, and less abrupt than on full-frame systems, even at equivalent apertures.
This phenomenon arises from the need to use a longer focal length on a medium-format camera to achieve the same field of view as a full-frame camera. As PetaPixel’s analysis on the topic confirms, a 63mm lens on a medium-format sensor provides a similar perspective to a 50mm lens on full-frame. This longer focal length naturally compresses the background and, critically, alters the way light is rendered as it falls out of the plane of focus. The result is a smoother, more painterly roll-off that contributes significantly to the feeling of depth and separation.
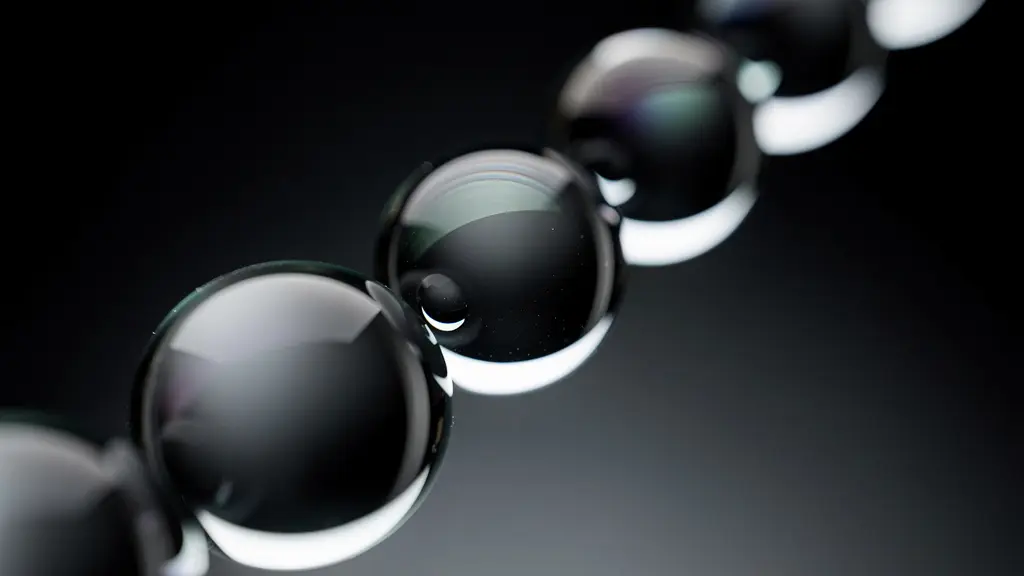
As the illustration above conceptualizes, the journey of light through larger optical elements designed for a bigger sensor creates a different rendering of out-of-focus areas. The circles of confusion are not only larger but their edges are rendered with a more nuanced tonal scale. This creates a sense of the subject being gently carved out of the background, rather than being sharply cut out. It’s a subtle but profound difference that software-based blur filters struggle to replicate authentically because it’s a direct consequence of the light-gathering geometry of the system.
Ultimately, this gentler transition is a foundational element of the medium-format look, providing a visual texture that feels both highly detailed and serenely calm within the same frame.
How to Push 16-Bit Files in Post Without Banding?
The term “16-bit color” is frequently mentioned in marketing materials, but its profound practical advantage is often understated. It represents the single greatest leap in post-production flexibility, providing what can be called tonal headroom. A 14-bit RAW file, standard in most full-frame cameras, can capture approximately 4.4 trillion colors. By contrast, a true 16-bit RAW file from a camera like a Hasselblad captures an astonishing over 281 trillion colours. This is not a marginal increase; it is an exponential expansion of data.
This vast reservoir of tonal information is the primary defense against banding—the ugly, step-like transitions that appear in smooth gradients like skies or studio backdrops when aggressive adjustments are made. With a 14-bit file, pushing shadows or pulling highlights can stretch the available data to its breaking point, revealing the gaps between tonal values. With a 16-bit file, the data is so dense that even extreme manipulations rarely cause the tonal fabric to tear. This allows for a fearless approach to editing, where creative intent is not limited by technical constraints.
However, harnessing this power requires a disciplined workflow. It is not enough to simply capture in 16-bit; the integrity of that data must be preserved throughout the entire editing process. Making aggressive, low-bit-depth adjustments can nullify the initial advantage. A methodical approach ensures the final image retains the smoothness and richness inherent in the original capture.
Action Plan: Preserving 16-Bit Data Integrity
- Capture Purity: Shoot in the camera’s native 16-bit single-shot RAW mode. Be aware that continuous high-speed modes often revert to 14-bit to manage data throughput.
- Maintain the Pipeline: Ensure your editing software (e.g., Adobe Lightroom, Capture One) is configured to process images in a 16-bit/ProPhoto RGB color space from import to export.
- Apply Gradual Adjustments: Utilize tonal curve tools for smooth, global adjustments rather than relying on blunt instruments like the contrast or clarity sliders, which can compress tonal ranges aggressively.
- Trust the Depth: Understand that even after compression or heavy adjustments, a 16-bit file retains far more discrete values per channel, ensuring perceptual continuity where a 14-bit file would show posterization.
- Archive with Fidelity: For master files, export to a 16-bit TIFF format. This creates a high-fidelity archival copy before any final, lossy conversions to JPEG for web or print.
This methodical process ensures that the extraordinary potential of the initial capture translates into a final image of unparalleled quality, free from the digital artifacts that plague lesser files.
Autofocus Speed vs. Image Quality: Is the Trade-off Worth It?
In the world of high-performance cameras, autofocus speed is often championed as a primary metric of success. Systems are lauded for their ability to track fast-moving subjects with tenacious precision. However, in the rarefied air of high-end medium format, the conversation shifts. Here, the pinnacle of image quality sometimes necessitates a deliberate trade-off, prioritizing absolute accuracy and a methodical process over sheer velocity. This is not a system built for spray-and-pray sports photography; it is an instrument for considered creation.
A comparison between leading medium-format models reveals this philosophical divide. For instance, as noted by Digital Camera World, a system like the Fujifilm GFX 100 II offers significantly faster burst shooting and more advanced AF tracking than a Hasselblad X2D 100C. The GFX is designed to be more versatile, bridging the gap between methodical studio work and more dynamic situations. The Hasselblad, by contrast, focuses its resources on a different goal. Its autofocus, while precise, is built for a slower, more deliberate pace. This is not a flaw, but a design choice.
This trade-off is worth it for the photographer whose final output is a single, perfect frame destined for a large-scale print or a gallery wall. The slower process encourages a more thoughtful engagement with the subject. It forces a refinement of composition and a precise selection of the focal plane. The energy that other systems pour into predictive tracking algorithms is instead invested in ensuring that the data integrity of each individual capture is absolute. This means optimizing the sensor readout, the lens-to-sensor communication, and the RAW file construction for maximum fidelity, not maximum speed.
For the target user, the “shot” is not the one captured in a frantic burst, but the one that results from careful orchestration. In this context, sacrificing a few milliseconds of AF speed for a tangible gain in final image quality is not just a worthy trade-off; it is the entire point.
The Mirror Slap Mistake That Ruins Medium Format Resolution
With sensors packing 100 megapixels or more, the pursuit of ultimate resolution introduces a new set of challenges. At this level of detail, the image is vulnerable to even the most microscopic vibrations. While the term “mirror slap” is a holdover from DSLR and film-era medium format, the underlying principle of shutter-induced vibration remains a critical threat in today’s mirrorless systems. The mechanical movement of the focal-plane shutter curtains can create a subtle shockwave that travels through the camera body, softening the very details you invested so heavily to capture.
This problem is most pronounced within a specific range of “critical shutter speeds,” typically between 1/15s and 1/125s. At these speeds, the vibration frequency has just enough time to manifest as a slight blur in the final image, a heartbreaking flaw that negates the sensor’s potential. As one technical specialist at Tonal Photo explains in their analysis:
When you press the shutter release, there’s always a chance, however slight, that the motion of your finger induces camera movement. In continuous mode, the second frame in a short burst shouldn’t have this problem
– Technical photography specialist, Hasselblad X2D II 14-Bit in Continuous Mode Explained
This highlights that even the act of pressing the shutter is a source of potential degradation. To achieve true, tack-sharp 100-megapixel resolution, one must adopt a rigorous technique that mitigates every possible source of movement. This is a discipline that separates the casual user from the master practitioner, requiring a near-ceremonial approach to capture.
- Identify the Danger Zone: Be acutely aware of the critical shutter speed range (1/15s to 1/125s) where shutter shock is most likely to occur.
- Engage Electronic First Curtain Shutter (EFCS): For all tripod-based work, using EFCS eliminates the vibration from the first shutter curtain’s movement, which is the primary culprit.
- Isolate Your Touch: Always use a 2-second timer or a remote shutter release (cable or wireless). This completely decouples the vibration of your hand from the moment of exposure.
- Dampen the System: A sturdy tripod is non-negotiable. For maximum stability, add weight to the tripod’s center column with a camera bag or specialized sandbags to dampen any environmental or internal resonances.
- Apply Gentle Stabilization: In certain situations, applying very slight, steady downward pressure on the lens hood with your hand can provide an extra layer of micro-vibration dampening during the exposure.
By treating the camera not as a point-and-shoot device but as a precision scientific instrument, the photographer can ensure that every one of those one hundred million pixels is rendering the scene with absolute fidelity.
Which Lenses Can Actually Resolve 100 Megapixels?
The megapixel race has created a common misconception that sensor resolution is the sole determinant of image detail. In reality, a sensor is only as good as the lens in front of it. An ultra-high-resolution sensor paired with mediocre glass is like a concert pianist playing on an out-of-tune piano; the potential is there, but the output is compromised. Achieving true 100-megapixel clarity requires a level of optical congruence, where the lens is physically capable of resolving detail fine enough for the sensor’s tiny pixels to record.
The benchmark for this is staggering. Optical bench testing from specialists at LensRentals reveals that to do justice to a 150-megapixel sensor, a lens must demonstrate a 240 lp/mm (line pairs per millimeter) resolution capability. This is an extraordinarily high standard that many excellent full-frame lenses simply cannot meet, especially away from the frame’s center. This is why medium-format lens systems are designed, from the ground up, with massive glass elements and uncompromising optical formulas. They are engineered for one purpose: to deliver an almost perfectly flat field of focus with incredible resolving power from edge to edge.

The real-world implications are stark. The same LensRentals study found that while a few elite prime lenses, like the Zeiss Otus 85mm f/1.4, could approach the required resolution in the center of the frame when stopped down, none could maintain that performance near the edges. Medium-format lenses, on the other hand, are designed with a much larger image circle than the sensor itself. This means that the camera is effectively using the “sweet spot” of the lens, where optical aberrations are most controlled and sharpness is at its peak across the entire frame. This is a luxury that smaller formats, which use glass much closer to its physical edge, cannot afford.
Investing in a medium-format system is therefore a dual investment: one in a sensor capable of capturing immense detail, and another in a set of optics physically built to deliver that detail with uncompromising fidelity.
Why Does a 40-Megapixel Image Look Soft at 2 Meters Wide?
The perception of sharpness is not an absolute value; it is relative to viewing distance and print size. An image that looks perfectly sharp on a 27-inch monitor can reveal its limitations when enlarged to a gallery-sized print. This is the realm of perceptual acuity, where the density of information—measured in Dots Per Inch (DPI)—becomes the critical factor. A 40-megapixel full-frame sensor, while highly capable for many applications, simply may not contain enough raw data to maintain a high-quality appearance when stretched to a significant size, such as two meters wide.
At this scale, the individual pixels start to become apparent, or the interpolation required to create the print results in a general softness. The image lacks the “bite” and fine textural detail that the human eye expects to see in a large print viewed from a respectful distance. This is where the sheer data advantage of a 100-megapixel medium-format sensor becomes undeniable. It captures more than double the information, allowing for a much higher DPI at the same print size. This higher density of information translates directly into a perception of greater detail, clarity, and realism.
The following table illustrates this relationship clearly, showing how sensor resolution directly impacts the resulting print quality at a demanding size. As the data from Fstoppers’ analysis highlights, there is a clear threshold where perceived quality begins to break down.
| Sensor Resolution | Print Size | DPI at Size | Perceived Quality |
|---|---|---|---|
| 40MP Full Frame | 2 meters wide | ~125 DPI | Soft/pixelated |
| 100MP Medium Format | 2 meters wide | ~200 DPI | Sharp/detailed |
| 150MP Phase One | 2 meters wide | ~245 DPI | Museum quality |
For the photographer whose ambition is to see their work on a gallery wall, the choice of a higher-resolution medium-format system is a direct investment in the final, tangible expression of their vision.
Why Does Sensor Size Actually Affect Depth of Field?
One of the most persistent and romanticized aspects of the medium-format look is its supposed “magical” depth of field. The prevailing theory is that the larger sensor inherently produces a shallower depth of field. As the technical team at Digital Camera World puts it, this is a core part of the discussion:
When examining the idea of the medium format look, one of the prevailing theories regards how depth of field is affected by the larger sensor. Essentially, medium format cameras will be able to produce images with a shallower depth of field than a full frame camera – but will also be able to retain a wider field of view
– Digital Camera World Technical Team, What is the medium format camera ‘look’
While the observation is correct, the cause is not magic, but a simple and elegant consequence of physics. Depth of field is determined by three factors: aperture, focal length, and camera-to-subject distance. The “trick” lies in the interplay between sensor size and focal length. To achieve the same field of view on a larger sensor, you must use a proportionally longer focal length. For example, to match the view of a 50mm lens on a full-frame camera, you might need a 65mm or 80mm lens on a medium-format system, depending on the exact sensor dimensions.
This change in focal length is the key. At any given aperture (e.g., f/2.8), a longer focal length will always produce a shallower depth of field. Therefore, the medium-format system, by necessity of its design, allows you to capture a wide, expansive view of a scene *while simultaneously* employing the physics of a longer lens to compress the background and create a more dramatic subject separation. You get the shallow depth of field of a short telephoto lens combined with the field of view of a normal or wide-angle lens. This is a combination that is physically impossible to replicate on a smaller sensor format in a single capture.
It is not that the sensor itself has a different depth of field; it is that the sensor size *forces* optical choices that result in a different rendering of depth, giving images that characteristic, immersive quality.
Key Takeaways
- The distinct depth-of-field rendering of medium format is a direct result of physics: a larger sensor requires a longer focal length for an equivalent field of view, which naturally produces a shallower depth of field.
- True 16-bit color is not a marginal improvement; it represents an exponential leap in captured data, providing immense ‘tonal headroom’ that allows for aggressive post-production without image degradation like banding.
- Ultimate resolution requires ‘optical congruence’; the extraordinary resolving power of a 100MP sensor is only realized when paired with lenses specifically engineered to deliver that level of detail across the entire frame.
How to Capture High Dynamic Range Scenes Without the “Fake HDR” Look?
High Dynamic Range (HDR) photography has, for many, become synonymous with an over-processed, unnatural aesthetic. This “fake HDR” look is typically the result of merging multiple, bracketed exposures and using aggressive tone-mapping algorithms that create halos, flat lighting, and garish colors. The medium-format approach to capturing high-contrast scenes is philosophically opposite. It is not about combining multiple imperfect captures, but about leveraging the immense native dynamic range of a single RAW file.
Modern medium-format sensors can capture over 15 stops of dynamic range in a single exposure. This vast latitude means that within one file, there is retrievable, high-quality detail in both the deep shadows and the bright highlights of a scene. The goal is to capture all this information in one go, preserving the natural relationship between light and shadow. This is achieved through a meticulous technique known as “Exposing to the Right” (ETTR).
The ETTR workflow involves intentionally overexposing the image as much as possible without clipping the brightest highlights. This pushes the shadow and mid-tone information into the higher, cleaner end of the sensor’s data range, maximizing signal-to-noise ratio. In post-production, the exposure is simply pulled back down, revealing a clean, rich, and incredibly detailed file that spans the entire dynamic range of the scene. The result is an image with stunning depth and detail that looks powerful and authentic, not artificial. This technique requires precision and a full understanding of your camera’s histogram.
- Set your camera’s display to show a live histogram and enable the highlight clipping warning (“blinkies”).
- Compose your shot and increase exposure until the histogram is pushed as far to the right as possible, just before any significant highlight areas begin to clip (blink).
- For maximum precision, use spot metering on the brightest part of the scene that you want to retain detail in (e.g., a bright cloud, not the sun itself).
- From that meter reading, add between 1.5 and 2 stops of positive exposure compensation as a starting point.
- Always capture at your camera’s lowest native ISO (typically ISO 64 or 100) for the cleanest possible file.
To make an investment of this magnitude, the logical next step is to evaluate these profound technical advantages against your own creative ambitions and professional requirements.