
The debate over softbox shape is a distraction; achieving painterly, window-like light is not about mimicking a shape but mastering the physics of light’s character and falloff.
- The size of the modifier, not its shape, is the primary factor determining the softness of light transitions on skin.
- True artistic control comes from shaping light with grids and negative fill, creating dimension through shadow rather than just illumination.
Recommendation: Choose your softbox based on the desired light quality and the story you want the shadow to tell, not on the shape of the catchlight in the eye.
For portrait photographers chasing the elusive quality of North Light, the softbox is the quintessential tool for taming the raw power of a studio strobe. The debate often centers on a seemingly simple question: rectangular or octagonal? The common wisdom dictates that rectangular softboxes, by their very nature, are the obvious choice to replicate the effect of a window. After all, most windows are rectangular. This logic, while sound on the surface, misses the soul of the matter. The painterly quality of light revered by artists from Rembrandt to Vermeer is not born from a shape, but from a specific set of physical properties: its size relative to the subject, the quality of its diffusion, and the gentle graduation from highlight to shadow.
Focusing solely on shape is like judging a violin by its color. The true artistry lies in understanding how to control the light’s character. It’s about sculpting with luminous volume, using grids to carve light away, and choosing an interior lining not for its output, but for how it renders the texture of skin or the sheen of silk. This guide moves beyond the platitudes of shape and catchlights. It delves into the technical and artistic principles of light modification, empowering you to create a convincing, evocative window light effect in a windowless studio, regardless of whether your modifier has four sides or eight.
This article will deconstruct the essential elements of light quality. We will explore why size trumps shape for creating soft transitions, how to use grids to achieve dramatic isolation, and how to choose between silver and white linings for specific artistic outcomes. By understanding these core principles, you can elevate your lighting from simple illumination to a powerful narrative tool.
Summary: A Photographer’s Guide to Crafting Window Light with Softboxes
- Why Does a Larger Softbox Create softer Transitions on Skin?
- How to Use a Grid on Your Softbox to Isolate the Subject?
- Silver vs. White Interiors: Which Softbox Lining Suits High-Contrast Art?
- The Catchlight Mistake That Makes Eyes Look Artificial
- How to Feather Your Light to Wrap Around the Subject Naturally?
- Bare Bulb or Softbox: Which Reveals Texture Better?
- How to Wrap Light Around the Face Without Washing Out Features?
- How to Choose Studio Strobes That Maintain Color Consistency Across 500 Shots?
Why Does a Larger Softbox Create softer Transitions on Skin?
The single most important principle in creating soft, painterly light is the law of relative size: the larger the light source in relation to the subject, the softer the light. This is not about the geometric shape of the modifier but about fundamental physics. A large softbox emits light from a wider surface area, allowing light rays to approach the subject from many different angles. These overlapping rays “fill in” the micro-shadows on the skin, creating a gentle, gradual transition from highlight to mid-tone to shadow. This sfumato effect is what we perceive as softness.
Conversely, a small light source acts more like a point source, with light rays traveling in parallel lines. This creates a single, hard-edged shadow for every surface contour, resulting in high contrast and emphasized texture. As a general rule, a larger modifier produces softer light because its bigger volumes and surface areas are more effective at spreading and diffusing the bright, harsh flash from the strobe head. Fortunately, modern digital sensors have vastly improved our ability to work with large, light-hungry modifiers. The fact that current camera sensors handle ISO 1600-6400 cleanly means photographers are no longer tethered to high-power strobes or wide apertures to get a proper exposure.
To understand this visually, consider the portrait below, lit with a large softbox to create a classic Rembrandt lighting pattern. The transition across the cheekbone is exceptionally smooth and graduated, a hallmark of this type of lighting.
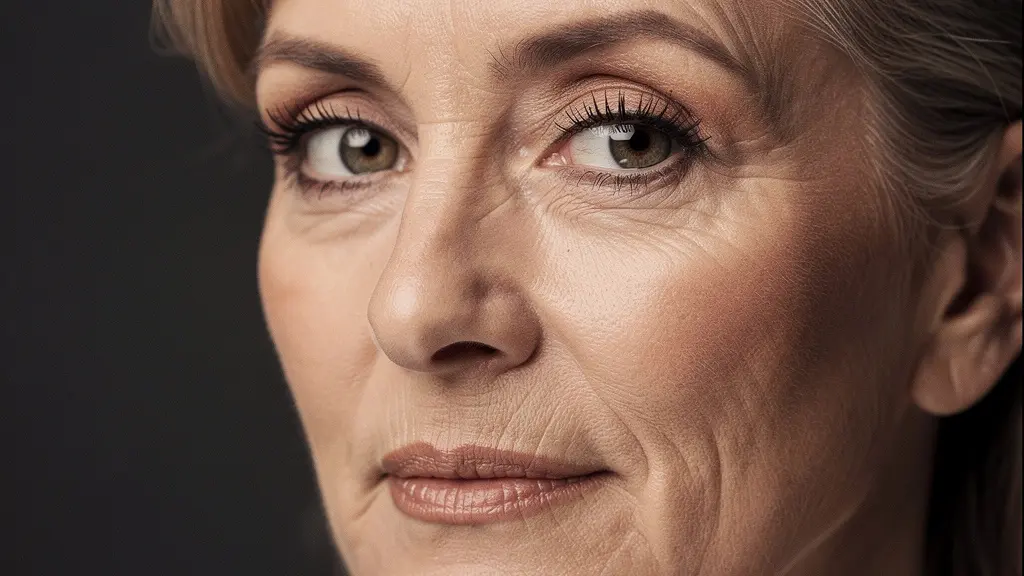
The key takeaway is that when you want to emulate the soft, wrapping quality of a large, overcast window, you must choose a modifier that is significantly larger than the part of the subject you are photographing. For a headshot, a softbox measuring 1.5 times the size of the head and shoulders is a good starting point. The goal is to create a luminous volume of light that envelops the subject, rather than simply illuminating it.
How to Use a Grid on Your Softbox to Isolate the Subject?
While a large softbox creates beautiful, soft light, its broad spread can also be a liability. The light can spill onto the background, fill in desirable shadows, and reduce the overall contrast and mood of the image. This is where a softbox grid, or “egg crate,” becomes an indispensable tool for sculpting with shadow. A grid is a fabric accessory with a honeycomb structure that attaches to the front of the softbox. It doesn’t make the light harder; rather, it collimates the light, forcing the rays to travel in a more parallel, focused direction.
The primary function of a grid is to dramatically reduce light spill and narrow the beam angle. This allows you to precisely place light on your subject while keeping the background dark, creating a strong sense of separation and depth. This technique is fundamental to achieving a chiaroscuro effect, characterized by strong contrasts between light and dark. It’s especially crucial in small studio spaces where you cannot achieve separation by simply moving the subject far from the background.
Grids are available in various beam spreads, typically measured in degrees (e.g., 20°, 30°, 40°). The lower the degree, the tighter the beam and the more dramatic the effect. According to B&H Photo Video, honeycomb grids reduce the beam spread to 60, 40, and even 20 degrees, giving the photographer immense directional control.
Case Study: Grid Application for Chiaroscuro Portrait Lighting
In a demonstration, photographer Karl Taylor attaches a soft grid to his octabox. The effect is immediate: the light becomes more contrasty, and the spill on the background is significantly cut. This simple accessory transforms a broad, flat light into a focused, moody key light, proving invaluable for photographers working in tight quarters who need to control light spill without physically moving their setup.
The choice of grid density is an artistic one, allowing you to fine-tune the drama and mood of your portrait. A tight grid creates a focused pool of light, perfect for a dramatic, Caravaggio-style portrait, while a wider grid offers more general spill control with a softer falloff.
| Grid Angle | Beam Spread | Shadow Quality | Artistic Application |
|---|---|---|---|
| 20° | Very narrow | Sharp falloff | Extreme drama |
| 30° | Narrow | Rapid falloff | Caravaggio-style |
| 40-50° | Moderate | Gradual falloff | Subtle vignetting |
| 60° | Wide | Soft falloff | General control |
Silver vs. White Interiors: Which Softbox Lining Suits High-Contrast Art?
The interior lining of a softbox is a critical, yet often overlooked, component that defines the character of its light. The choice between a pebbled silver interior and a solid white interior is not merely about efficiency; it’s about deciding between specular crispness and diffused richness. This choice directly impacts how light renders texture and form, making it a key artistic decision, especially when aiming for a high-contrast, painterly look.
A silver interior is highly reflective and efficient. It bounces light around with minimal absorption, resulting in a more specular, higher-contrast output. This “punchy” quality creates defined, crisp highlights and is superb for accentuating texture. It excels at rendering the sheen of silk, the glint of metal, or the tactile quality of leather. When used without a front diffuser, the raw silver lining produces a crisp, defined light that can add significant punch to an image. This is ideal for commercial, fashion, or dramatic portraiture where you want details to pop.
A white interior, conversely, acts as a secondary layer of diffusion. It absorbs some light and scatters the rest, producing a softer, less specular, and lower-contrast output. This creates a broader, more even light with incredibly smooth tonal gradations. It’s the preferred choice for achieving a classic, soft beauty light that is exceptionally flattering on skin. A white interior excels at rendering the rich, deep tones in fabrics like velvet or wool without creating unwanted reflective sheen. As noted by lighting experts, for soft light, a white diffuser is used as a front cover, but for a crisper light, using the silver lining without the cover gives more punch.
Action Plan: Auditing Your Light’s Textural Rendition
- Identify Target Textures: List all the key textures in your scene (e.g., skin, hair, fabric type, jewelry).
- Define Desired Character: For each texture, decide if you want to emphasize its specular quality (sheen, crispness) or its diffused quality (rich color, soft form).
- Select Modifier Interior: Choose a silver interior for specular highlights (like on silk or leather) or a white interior for diffused richness (like on wool or skin).
- Assess Diffusion Level: Determine if you need single or double diffusion. Consider a silver interior with double diffusion for a unique “specular softness” that defines form without harshness.
- Test and Refine: Take test shots, focusing specifically on how the light is rendering your target textures, and adjust the modifier or its distance accordingly.
Ultimately, the choice is not about which is “better,” but which is right for the story. For a high-contrast artistic style that mimics the dramatic interplay of light and shadow, a silver-lined modifier often provides the necessary crispness and control to make your subject stand out with authority and dimension.
The Catchlight Mistake That Makes Eyes Look Artificial
The catchlight—the specular reflection of a light source in a subject’s eyes—is often a point of obsession for portrait photographers. Many believe that a round catchlight from an octabox is more “natural” than a square one from a rectangular softbox. This fixation is a critical mistake. It prioritizes a minuscule detail over the overall quality and character of the light that is shaping the entire portrait. An unnaturally placed or overly complex catchlight is a dead giveaway of artificial lighting and can create a hollow, doll-like gaze.
The most natural catchlights emulate a single, dominant light source, like the sun or a window. In classical portraiture, this is typically achieved by placing the key light high and to one side, resulting in a single catchlight appearing at the 10 o’clock or 2 o’clock position in the iris. This placement imparts a sense of life and dimension. Conversely, a light placed directly on-axis with the camera (like a ring light) creates a centered catchlight that flattens the eye and can look synthetic. Multiple catchlights from several sources can be distracting and confusing, breaking the illusion of a single, natural source.
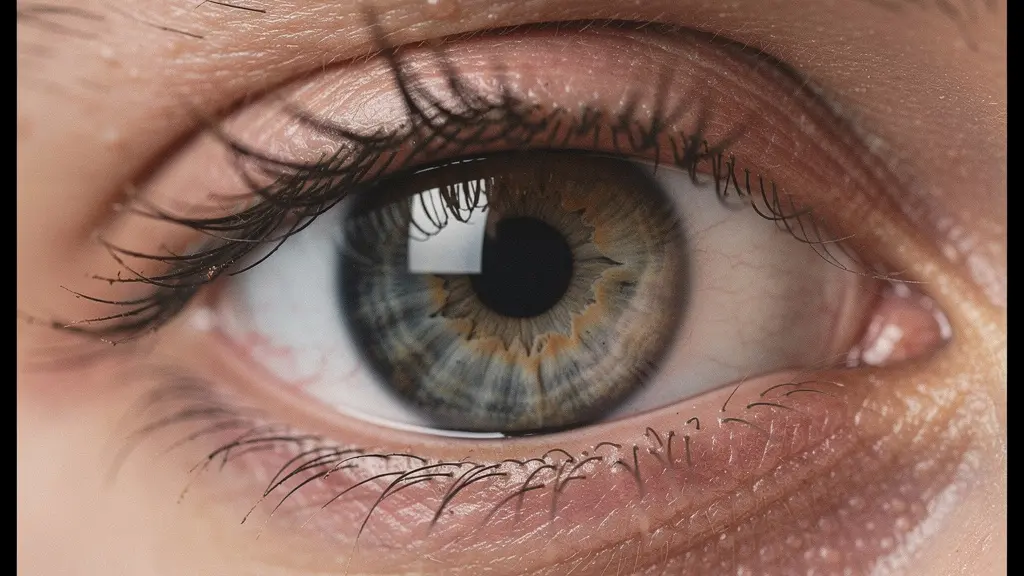
The shape of the catchlight is far less important than its placement and singularity. As a guide from Adorama points out, the catchlight from a large rectangular softbox often looks like it was created by a window, making the effect appear natural. The ultimate goal is to create a vital spark, not a perfect geometric shape. Renowned lighting expert Jane Conner-Ziser reinforces this, stating in The Lens Lounge Photography Guide that you should be “choosing your softbox based on the light effect that you want. Not just catchlights, which are a minuscule part of a portrait.”
So when photographing portraits with a softbox indoors, you really should be choosing your softbox based on the light effect that you want. Not just catchlights, which are a minuscule part of a portrait.
– Jane Conner-Ziser, The Lens Lounge Photography Guide
Focus on creating beautiful, shaping light first. If the light is good, the catchlight will naturally fall into place and look believable, regardless of whether it’s square or octagonal.
How to Feather Your Light to Wrap Around the Subject Naturally?
Feathering the light is an advanced technique that separates proficient technicians from true artists of light. It involves using the edge of your softbox’s beam, rather than the center “hot spot,” to illuminate your subject. This creates an incredibly soft, delicate light with a very gradual falloff that wraps around the contours of the face in a natural, three-dimensional way. It’s the secret to achieving that coveted painterly look where the subject seems to emerge softly from the shadows.
To execute this technique, you aim the center of your softbox just past your subject, either in front of them or behind them. The subject is then lit only by the “feathered” edge of the light cone. The light that strikes them is less intense and more diffused than the direct beam, resulting in softer shadows and more subtle transitions. This technique requires precision and a good understanding of how your specific modifier behaves, but the results are unmatched in their subtlety and beauty.
Mastering feathering also involves actively managing the shadows through the use of negative fill. While a white reflector placed opposite the key light can fill in shadows and reduce contrast, a black card or fabric (negative fill) does the opposite. It absorbs stray light and prevents it from bouncing back onto the shadow side of the face. This deepens the shadows, increases modeling, and enhances the sense of dimensionality. As one professional guide on window light suggests, you can use a reflector to fill shadows, but it’s equally important to use black foam board, fabric, or even a dark curtain to block spill or reduce unwanted reflections for maximum control.
By combining a feathered key light with careful use of negative fill, you can precisely control the lighting ratio and sculpt the face with a level of nuance that is impossible with direct lighting alone. This is how you move from simply lighting a subject to painting them with light.
Bare Bulb or Softbox: Which Reveals Texture Better?
The choice between a bare bulb strobe and a softbox is a fundamental decision about texture. Each light source is designed to render texture in a completely different way, and understanding this distinction is key to making intentional artistic choices. A softbox is designed to suppress texture, while a bare bulb is designed to reveal it.
A softbox, by its very nature, produces diffuse light. It is a tool for creating softness and flattering form, effectively minimizing harsh shadows and smoothing over imperfections. This is excellent for revealing macro-texture—the overall shape, volume, and form of a subject. When you want to sculpt the planes of a face or show the gentle drape of a heavy fabric, a softbox is the ideal tool. It creates what ProEdu describes as soft, flattering light that minimizes harsh shadows. However, this very quality makes it poor at revealing fine detail.
A bare bulb, on the other hand, is a hard, specular point source. It creates sharp, defined shadows that trace every tiny contour of a surface. This makes it the perfect tool for revealing micro-texture. If you want to emphasize the intricate weave of a fabric, the grain of a piece of wood, or the pores on a person’s skin, a hard light source like a bare bulb is far more effective. While many portrait photographers shy away from hard light, it can be a powerful creative tool when used intentionally to add character, grit, or drama to an image.
The most advanced approach often involves a hybrid technique, using both sources to achieve a complete rendering of detail. A large softbox can be used as a main key light to define the overall form, while a gridded bare bulb can be used as a secondary “kicker” or accent light to selectively scrape across a surface and pop out its micro-texture.
| Light Type | Texture Type | Shadow Quality | Best Application |
|---|---|---|---|
| Bare Bulb | Micro-texture | Sharp, defined | Fabric weave, wood grain, skin pores |
| Softbox | Macro-texture/Form | Soft, gradual | Overall shape and volume |
| Hybrid (Both) | Complete detail | Mixed | Form with selective texture emphasis |
The question is not which is better, but what story you want to tell. Do you want to emphasize form and grace, or texture and character? The answer will guide your choice of modifier.
How to Wrap Light Around the Face Without Washing Out Features?
Creating a beautiful “wrap” of light around the face is a hallmark of sophisticated portraiture. It’s the quality that gives a subject form and dimensionality, making them feel three-dimensional rather than flat. However, there’s a fine line between a luminous wrap and a washed-out, over-lit image that lacks contrast and definition. The secret lies in controlling both the light’s distance and its shadow.
The distance of your softbox from the subject directly influences the quality of the light wrap and the speed of the falloff. A key principle highlighted in lighting education is that how far away the light is from your subject will influence things like hardness or softness of the light. When a large softbox is brought very close to the subject, the light becomes extremely soft and wraps extensively, but it can also reduce contrast to the point where facial features lose their shape. As you pull the light further away, it becomes relatively smaller, the shadows become harder, and the contrast increases. The art is in finding the perfect balance point for your specific subject and desired mood.
To maintain definition while achieving a beautiful wrap, it’s crucial to control the shadow side of the face. The Three-Quarter Rule for Rembrandt lighting is a perfect model for this. You position the light to illuminate roughly three-quarters of the face, allowing the far quarter to fall into shadow. This creates the iconic “Rembrandt triangle” of light on the shadowed cheek. To ensure this shadow has depth and isn’t contaminated by ambient light, place a black reflector or flag opposite the softbox. This negative fill will absorb any spill and carve out the shadow, enhancing the sense of volume and form.
As one photographer notes in a piece for The Lens Lounge, the goal is often to create a specific, naturalistic effect. They mention, I used a large rectangular softbox to camera right to create soft light that looks like natural light coming in through a window. This goal is achieved not just by the softbox, but by its careful placement and the management of the resulting shadows to create a believable, dimensional wrap of light.
Key Takeaways
- The softness of light is determined by the modifier’s size relative to the subject, not its shape.
- Grids and negative fill are essential tools for sculpting with shadow and adding dimensionality.
- The choice of a softbox’s interior lining (silver vs. white) directly impacts the rendition of texture and contrast.
How to Choose Studio Strobes That Maintain Color Consistency Across 500 Shots?
The most masterful lighting setup is worthless if the foundation—the strobe itself—is unreliable. For a professional photographer aiming for a painterly and consistent look, especially across a long series of shots, color consistency and power stability are non-negotiable technical requirements. A strobe that shifts in color temperature or power output from one shot to the next will ruin a shoot, creating a post-production nightmare.
When selecting a studio strobe, the first critical factor is its color temperature consistency across the entire power range. Many cheaper strobes exhibit significant color shift when their power is adjusted. A high-quality strobe will maintain a stable Kelvin temperature (e.g., 5500K ±100K) whether it’s firing at full power (1/1) or its lowest setting (e.g., 1/128 or 1/256). Before purchasing, always check the manufacturer’s specifications for color stability and look for independent reviews that test this specific attribute.
The second factor is power consistency. The strobe should deliver the exact same amount of light every time it fires at a given power setting. Any fluctuation will lead to inconsistent exposures that are difficult to correct. A third, related specification is the flash duration (t.1 time). A shorter flash duration is better for freezing motion, which is crucial for capturing crisp details even with moving subjects. Strobes with Insulated-Gate Bipolar Transistor (IGBT) technology typically offer more stable color and shorter flash durations at lower power settings.
While often marketed for video, the principles of reliable lighting apply across media. A note on lighting kits mentions that a professional softbox studio lighting kit is a must for producing high-quality videos. This underscores the universal need for consistent, dependable light sources, whether for stills or motion. Ultimately, investing in a reputable strobe system with proven consistency is investing in your own efficiency and the quality of your final artwork. It is the technical bedrock upon which all artistic lighting is built.
Begin today by experimenting with these principles. Move your light, feather it, add a grid, and see how the character of the shadow tells a different story. True mastery of light begins when you stop asking what shape a tool is and start asking what story it can help you tell.