Many photographers rely on rules of thumb, but true creative control comes from understanding the underlying physics. This article moves beyond simplistic advice to explain the ‘why’ behind depth of field, diffraction limits, and lens characteristics. It reveals how phenomena like spherical aberration and photon overflow are not just technical constraints, but physical principles you can consciously manipulate for artistic effect.
For the aspiring photographer, the world is filled with well-meaning advice: use a large aperture for a blurry background, avoid shooting at f/22, and always invest in prime lenses. While these adages hold practical truth, they often function as unbreakable rules rather than flexible guidelines. They teach the “what” but completely ignore the “why.” This approach can lead to creative plateaus, where technical execution is proficient but lacks intentionality because the artist doesn’t truly understand their tools at a fundamental level.
The common discourse around photography often touches upon concepts like sensor size or lens coatings but rarely ventures into the fascinating physics that governs them. We talk about bokeh without discussing spherical aberration, or we fear diffraction without visualizing the behavior of light waves themselves. This leaves a gap between operating a camera and truly mastering the art of capturing light. The real key to unlocking the next level of creative control lies not in memorizing more rules, but in grasping the scientific principles that make them true.
This is where an understanding of optical physics becomes a photographer’s greatest asset. What if you could predict precisely how a sensor would render highlights, not by guesswork, but by understanding photon behavior? What if you chose a lens not just for its focal length, but for the specific character of its optical aberrations? This article will deconstruct the physics behind the camera, transforming abstract concepts into tangible tools. We will explore the science of light capture, moving from accepted wisdom to a foundational understanding that empowers you to bend the laws of optics to your creative will.
To navigate this exploration of photographic physics, this guide is structured to dissect core optical principles one by one. The following sections will illuminate everything from the quantum behavior of your camera’s sensor to the wave nature of light itself, providing a clear path from theory to creative application.
Contents: A Physicist’s Guide to Photographic Control
- Why Does Sensor Size Actually Affect Depth of Field?
- How to Calculate the Diffraction Limit for Your Specific Camera?
- Nano-Coating vs. Multi-Coating: Does It Reduce Flare Effectively?
- The Over-Exposure Mistake That Causes Sensor Blooming on Highlights
- How to Minimize Focus Breathing in Focus Stacking Workflows?
- The Small Aperture Mistake That Makes Your f/22 Shots Soft
- Why Does the Transition from Sharp to Blur Feel Different?
- Why Shooting with Prime Lenses Improves Your Compositional Discipline?
Why Does Sensor Size Actually Affect Depth of Field?
One of the most repeated maxims in photography is that larger sensors produce a shallower depth of field. While empirically true, the statement is a simplification that masks the underlying physics. The sensor itself does not inherently alter optical laws; rather, the change in depth of field is a direct consequence of how we must adjust our shooting parameters—specifically focal length and subject distance—to maintain the same field of view when switching between sensor sizes. To achieve the same composition on a smaller APS-C sensor as on a full-frame sensor, you must either use a wider focal length or move further away from your subject. Both actions inherently increase the depth of field, a physical reality independent of the sensor.
The core concept is the circle of confusion (CoC), which is the largest blurred point that a human eye will still perceive as sharp. A larger sensor format (like full-frame) has a larger acceptable CoC because the resulting image requires less magnification to be viewed at a standard size. This larger CoC allowance is the physical reason a scene can appear to have a shallower depth of field on a larger sensor, even when other factors are compensated for. It’s not magic; it’s a question of magnification and perceived sharpness.
Case Study: Smartphone Camera Sensor Analysis
The iPhone 15 Pro Max provides a perfect, modern example. Its main camera boasts an impressive 24mm equivalent field of view with a very wide f/1.78 aperture. However, because its sensor is vastly smaller than a full-frame one, the actual physical focal length is only around 5.6mm. This extremely short focal length naturally creates a very deep depth of field. The wide aperture is primarily necessary for light-gathering on the small sensor, not for achieving the background blur a 24mm f/1.78 lens would produce on a full-frame camera. This demonstrates how sensor size forces dramatic changes in the physical properties of an optical system to achieve a familiar field of view.
Understanding this relationship empowers you. Instead of just knowing “full-frame gives more blur,” you understand that you can emulate the depth of field of a different format by adjusting your aperture in proportion to the crop factor. This allows for precise and intentional control over your image’s depth, grounded in physics, not just a rule of thumb.
How to Calculate the Diffraction Limit for Your Specific Camera?
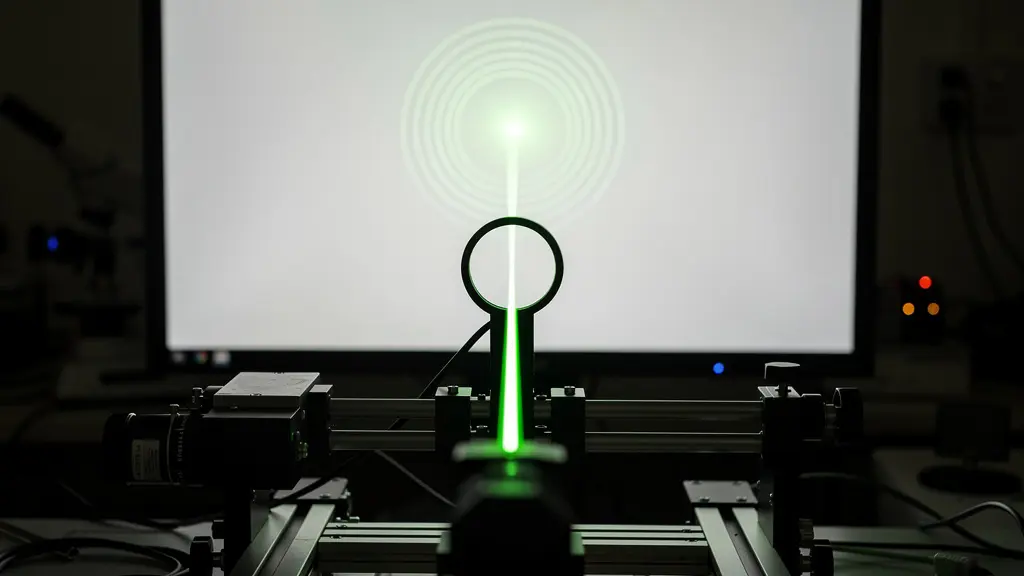
Every photographer eventually learns that stopping down a lens to its smallest aperture, like f/22 or f/32, paradoxically makes the image softer, not sharper. This phenomenon is called diffraction, and it represents a hard physical limit on the resolution of any optical system. It occurs because light, as it passes through the small aperture opening (the diaphragm), behaves like a wave and spreads out. These spreading light waves interfere with each other, causing a point of light to be recorded not as a perfect point, but as a small, blurred pattern known as an Airy disk.
When the aperture is wide, this Airy disk is smaller than the individual photosites (pixels) on your camera’s sensor, so it has no visible effect on sharpness. However, as you stop down the aperture, the Airy disk grows larger. The diffraction limit is reached when the Airy disk becomes large enough to cover multiple pixels. At this point, the finest details can no longer be resolved by the sensor, and the image begins to lose critical sharpness, regardless of how perfect your lens is. The onset of diffraction is therefore not a fixed f-stop; it is a direct function of your sensor’s pixel pitch—the physical size of its pixels.
Cameras with smaller, more densely packed pixels (like smartphones or high-resolution full-frame bodies) will show the softening effects of diffraction at wider apertures than cameras with larger, lower-density pixels. As noted by optical experts, a general rule is that the Airy disk can have a diameter of about 2-3 pixels before diffraction visibly limits resolution. Calculating the precise limit involves the formula D = 2.44 * λ * N (where D is the Airy disk diameter, λ is the wavelength of light, and N is the f-number), but a practical understanding comes from knowing your sensor’s characteristics.
The following table, based on data from Cambridge in Colour, illustrates how the diffraction limit varies dramatically with sensor type and pixel density.
| Camera Type | Resolution | Pixel Pitch | Visible Diffraction Start | Strong Diffraction |
|---|---|---|---|---|
| Canon EOS 20D | 8MP | 6.4μm | f/11 | f/16+ |
| Canon PowerShot G6 | 7MP | 2.3μm | f/5.6 | f/8+ |
| iPhone XR | 12MP | 1.3μm | f/1.8 (fixed) | N/A |
| 50MP Full Frame | 50MP | 4.1μm | f/8 | f/11+ |
Nano-Coating vs. Multi-Coating: Does It Reduce Flare Effectively?
Lens flare and ghosting are the enemies of contrast and clarity, caused by light reflecting internally between the multiple glass elements inside a lens. To combat this, manufacturers apply anti-reflective coatings. For decades, the standard has been “multi-coating,” a process that involves depositing several microscopic layers of metallic oxides onto the lens surface. The physics at play is known as thin-film interference. Each layer has a specific thickness and refractive index designed to cause destructive interference for certain wavelengths of light, effectively canceling out reflections.
However, multi-coating has its limits, especially with wide-angle lenses where light enters at very steep angles. This is where modern nano-crystal coating (or similar proprietary technologies) represents a significant leap forward. Instead of just a few solid layers, nano-coating adds a top layer composed of ultra-fine particles smaller than the wavelength of visible light, with a very low refractive index. This creates a gradient transition between the air and the glass, rather than an abrupt one, which is far more effective at minimizing reflections across a wider range of angles and wavelengths.
The result is a dramatic improvement in performance. While an uncoated glass element can reflect up to 8% of light, and a multi-coated element might reduce that to around 1%, nano-coatings can push this even lower. In fact, it’s known that advanced coating technologies now achieve 95-99% light transmission, which directly translates to better contrast, richer colors, and a stark reduction in flare and ghosting, even in the most challenging backlit situations. This technology is a testament to how controlling light at a near-molecular level translates into visibly superior images.
Understanding the difference isn’t just academic; it informs purchasing decisions. For a photographer who frequently shoots into the sun, such as a landscape or architectural specialist, investing in a lens with a modern nano-coating is a practical application of optical physics that will yield consistently cleaner files and require less corrective work in post-production.
The Over-Exposure Mistake That Causes Sensor Blooming on Highlights
Every digital photographer has seen it: a bright highlight, like a candle flame or a reflection on chrome, that “bleeds” into the surrounding darker areas, creating an unnatural, soft glow. This artifact is often mistaken for lens flare, but it is actually a sensor-level phenomenon known as blooming or charge overflow. To understand it, you have to visualize your camera sensor as a grid of millions of tiny buckets, or photosites, each designed to collect photons (light particles).
During an exposure, each photosite converts the photons it catches into an electrical charge. The brightness of that pixel in the final image is determined by the amount of charge accumulated. However, each photosite has a finite capacity, a point known as “full well capacity.” When a very bright light source is focused on a few photosites, they fill up extremely quickly. Once they are completely saturated, the excess charge has nowhere to go and spills over into adjacent, neighboring photosites. This charge overflow contaminates the data of the surrounding pixels, causing them to register as brighter than they should be, creating the characteristic blooming artifact.

This is not a lens flaw, but a fundamental limitation of sensor physics. Modern sensors, particularly CMOS sensors, have better anti-blooming structures than older CCD sensors, but the principle still applies in extreme cases of overexposure. Shooting in RAW format offers more latitude to recover highlights, but once blooming has occurred, the data in the surrounding pixels is permanently corrupted and cannot be fully recovered. The only true solution is to prevent the photosites from overflowing in the first place by controlling the exposure at the moment of capture, ensuring that even the brightest highlights fall just below the saturation point.
Knowing that blooming is a sensor-level issue, not an optical one, fundamentally changes your approach to handling high-contrast scenes. It emphasizes the importance of precise exposure techniques like “exposing to the right” (ETTR) without clipping, using graduated filters, or bracketing exposures to protect highlight detail at its source: the photon capture itself.
How to Minimize Focus Breathing in Focus Stacking Workflows?
Focus stacking is a powerful technique for achieving seemingly infinite depth of field, but practitioners often encounter a frustrating problem: slight shifts in framing between shots, which complicate alignment in post-production. This phenomenon is called focus breathing, and it refers to the subtle change in a lens’s field of view (and thus its effective focal length) as the focus is adjusted from near to far. It’s as if the lens is “breathing” in and out as you turn the focus ring.
This behavior is a byproduct of lens design. In still photography lenses, the primary goals are sharpness, compact size, and affordability. To achieve this, optical engineers use focusing systems where entire groups of lens elements move, which can slightly alter the lens’s magnification. A small amount of focus breathing is considered an acceptable compromise. For a single photograph, it is completely unnoticeable. But in a focus stacking sequence or during a video focus pull, it becomes a significant issue.
This is the primary reason why cinema lenses are so large, heavy, and expensive. One of their core design principles is to be parfocal (maintaining focus as the lens is zoomed) and to exhibit near-zero focus breathing. Their complex internal focusing mechanisms are engineered to adjust focus without altering the field of view. This optical consistency is non-negotiable in high-end cinematography, and the engineering required to achieve it commands a premium price.
This table highlights the design priorities and typical performance differences between lens types, explaining why focus breathing is a common issue in photography but not in professional cinema.
| Lens Type | Typical Breathing | Price Range | Primary Use | Design Priority |
|---|---|---|---|---|
| Still Photography | 5-10% FOV change | $200-3,000 | Photography | Sharpness, Size, Cost |
| Cinema/Cine | <1% FOV change | $2,000-50,000 | Video/Film | Parfocal, No Breathing |
| Hybrid | 2-5% FOV change | $1,000-5,000 | Photo/Video | Balanced Performance |
For photographers, minimizing breathing involves choosing modern lenses designed with video in mind (often labeled as ‘hybrid’), using software with robust alignment algorithms, or shooting with a bit more room around the subject to allow for cropping. Understanding the physical cause—a design trade-off—allows you to anticipate the problem and develop practical workarounds.
The Small Aperture Mistake That Makes Your f/22 Shots Soft
In the pursuit of maximum depth of field, especially in landscape photography, it is tempting to stop a lens down to its smallest aperture, such as f/22. The logic seems sound: a smaller opening should yield more of the scene in sharp focus. However, as discussed earlier, this is where the wave nature of light works against you. The severe diffraction at such a small aperture significantly degrades image sharpness, often negating the perceived gains in depth of field. The resulting image might have everything in focus, but nothing is critically sharp.
The impact is not subtle. Objective measurements quantify this loss of sharpness using Modulation Transfer Function (MTF) charts, which assess contrast and resolution. It has been shown that MTF can drop by 40-50% at f/22 compared to a lens’s optimal aperture (typically around f/5.6 to f/8). This is a massive reduction in resolving power, turning fine details like distant foliage or fabric texture into a soft mush. The lens is physically incapable of rendering fine detail at this setting, no matter its quality.
So why do so many photographers still use these apertures? As the team at Expert Photography notes, sometimes it’s a conscious trade-off: “Landscape photographers often have to shoot at and beyond f/16. That way, the depth of field will be larger, resulting in a seemingly sharper image.” The key word is “seemingly.” The overall impression can be one of sharpness because the entire scene from front to back is within the focal plane, but upon close inspection, no part of the image holds up to critical scrutiny. The mistake is not in using f/22, but in using it without understanding the compromise being made.
A physicist’s approach is to find a better solution that respects the laws of optics. Instead of relying on a single, diffraction-softened exposure, a more effective method is to shoot at the lens’s sharpest aperture (e.g., f/8) and use techniques like focus stacking or calculating the hyperfocal distance. These methods leverage the lens at its peak performance to achieve deep focus without sacrificing critical, pixel-level sharpness.
Action Plan: Auditing Your Deep-Focus Workflow
- Points of contact: List all typical scenarios where you require deep focus (e.g., landscapes, architecture, product shots).
- Collection: Inventory your current go-to lenses and their typical aperture settings for these scenarios.
- Coherence: Confront your current settings with your camera’s known diffraction limit. Are you consistently stopping down too far?
- Memorability/emotion: Review your past deep-focus images. Is the “apparent” sharpness of deep depth-of-field more impactful than the “critical” sharpness lost to diffraction?
- Integration plan: Create a new workflow that prioritizes focus stacking or hyperfocal techniques for your most critical shots, reserving f/22 only for non-critical applications.
Why Does the Transition from Sharp to Blur Feel Different?
Not all blur is created equal. Photographers often speak of “good” and “bad” bokeh, describing the aesthetic quality of the out-of-focus areas of an image. Some lenses produce a smooth, “creamy” blur, while others render a distracting, “nervous” blur. This subjective difference has a concrete physical cause: spherical aberration and the shape of the aperture. Spherical aberration occurs when light rays passing through the edge of a lens element are focused at a slightly different point than rays passing through the center.
Lens designers can intentionally leave a small amount of spherical aberration uncorrected to finely tune the character of the bokeh. Under-corrected spherical aberration, where the edges of the lens focus slightly closer than the center, tends to produce out-of-focus highlights that are brighter in the middle and fade softly at the edges. This creates the highly sought-after creamy bokeh. Conversely, over-corrected spherical aberration results in highlights that are brighter at the edge, creating a hard-edged, “soap bubble” effect that can appear nervous or busy.
The character of this transition from sharp to blur is also heavily influenced by the lens’s aperture diaphragm. The number and shape of the aperture blades determine the shape of out-of-focus highlights. It is a well-known design principle that modern lens designs with 9+ rounded aperture blades are able to maintain near-perfectly circular bokeh highlights even when stopped down to f/5.6 or beyond. Lenses with fewer or straight-edged blades will produce polygonal shapes, which can be less aesthetically pleasing. The choice between a vintage lens with “character” (and uncorrected aberrations) and a modern, technically perfect lens often comes down to this physical difference in rendering.
This explains why two lenses of the same focal length and aperture can produce images that feel drastically different. One is not necessarily “better” than the other; they are simply different physical instruments designed with different compromises. Understanding the role of spherical aberration and aperture design allows a photographer to choose a lens as an artist chooses a paintbrush—for its specific mark-making characteristics.
Key Takeaways
- True creative control stems from understanding the ‘why’ of optical physics, not just memorizing the ‘what’ of photographic rules.
- Phenomena like diffraction and sensor blooming are not lens flaws but fundamental physical limits that can be anticipated and managed.
- Lens characteristics like bokeh and focus breathing are direct results of specific design trade-offs involving optical aberrations and focusing mechanisms.
Why Shooting with Prime Lenses Improves Your Compositional Discipline?
The debate between prime and zoom lenses often centers on image quality or aperture speed. While primes typically offer advantages in both areas, their most profound benefit may be psychological and compositional. A prime lens has a fixed focal length, meaning you cannot zoom in or out. This constraint forces the photographer to “zoom with their feet”—to physically move within the scene to find the right composition. This act of moving is an act of engagement; it fosters a more intimate and thoughtful relationship with the subject and its environment.
From a physics and cognitive science perspective, this constraint simplifies the creative process. A zoom lens presents a near-infinite number of compositional choices at any given moment, which can lead to decision paralysis or lazy framing. A prime lens removes that variable. As photographer and physicist Lee Petersen eloquently puts it, “Using a fixed focal length trains the brain to ‘see’ the world in that specific field of view, allowing for pre-visualization of compositions before the camera is even raised.” You learn the precise boundaries of your frame, and your mind begins to automatically recognize potential compositions that fit within that window.
Furthermore, primes offer an optical purity that is difficult to achieve in a zoom. A zoom lens is a master of compromise, engineered to perform adequately across a range of focal lengths. A prime lens is an optimized specialist. It is designed with fewer moving parts and its optical formula is corrected for a single focal length, resulting in higher sharpness, better control of aberrations, and a more consistent and predictable rendering ‘character’. This consistency allows you to master the lens’s specific properties—its unique micro-contrast, color rendition, and bokeh—and use them as deliberate creative tools, rather than battling the variable optical compromises of a zoom.
Ultimately, the discipline imposed by a prime lens is a creative catalyst. By limiting your options, it forces you to think more critically about position, perspective, and angle. It trains your eye to see the world in a specific way, turning a physical constraint into a powerful tool for developing a distinct and intentional compositional style.
By moving beyond rules and embracing the fundamental laws of light, you transform your camera from a simple recording device into a precise scientific instrument. To truly master your craft, the next logical step is to deliberately experiment with these physical principles using your own equipment. See for yourself how the Airy disk grows, how highlights bloom, and how a prime lens changes your way of seeing.