In summary:
- Stop seeing three-dimensional scenes; learn to perceive a two-dimensional “graphic canvas” ripe for isolation.
- Mastering a telephoto lens is an act of “visual subtraction”—intentionally removing elements to reveal a stronger composition.
- Absolute stability is non-negotiable. The slightest shake from poor technique can destroy the sharp, abstract quality you’re aiming for.
- Use distance and compression as deliberate compositional tools to flatten perspective and create powerful graphic relationships between elements.
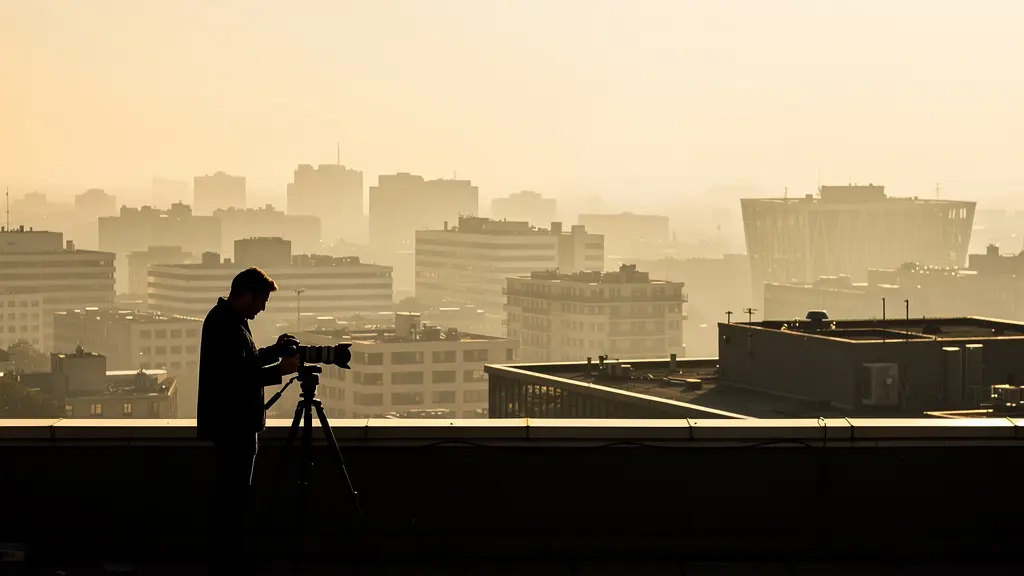
For many landscape photographers, a wide, chaotic scene is a source of frustration. You see the grandeur, but your camera captures a cluttered mess of competing elements. The common advice is to “use a telephoto lens to zoom in,” but this simplistic instruction misses the fundamental point. It treats the lens as a mere tool for magnification, like a pair of binoculars, rather than what it truly is: an instrument for re-framing reality. The issue isn’t your equipment; it’s your perception. You are trying to fit the world into your frame, when you should be extracting a frame from the world.
The true power of a long focal length lies not in getting closer, but in the discipline it imposes. It forces a perceptual shift away from inclusive, wide-angle thinking toward a practice of visual subtraction. This approach requires you to actively ignore the majority of a scene to find the hidden compositions within it—the graphic patterns, the subtle textures, the powerful relationships between distant layers. It’s about transforming a deep, three-dimensional space into a flat, compelling two-dimensional canvas. This guide isn’t about zooming; it’s about learning to see with the selective, focused vision that a telephoto lens demands.
Throughout this article, we will deconstruct the techniques and, more importantly, the mindset required to master this art of isolation. We will explore how to manage atmospheric distortion, flatten dimensions into patterns, achieve uncompromising stability, and use light and perspective to create images with profound graphic impact.
Summary: Using Telephoto Lenses for Landscape Isolation
- Why Does Heat Haze Ruin Your 400mm Landscape Shots?
- How to Flatten Three Dimensions into Graphic Patterns?
- 300mm or Macro Lens: Which is Better for Dragonfly Portraits?
- The Stability Error That Makes 70% of Telephoto Shots Soft
- When to Shoot Telephoto Landscapes to Emphasize Side-Lighting?
- How to Bring the Moon Closer to Your Foreground Subject?
- Why Does Getting Closer Often Create a Stronger Abstract Image?
- How to Compress Perspective to Make Distant Backgrounds Loom Large?
Why Does Heat Haze Ruin Your 400mm Landscape Shots?
Heat haze, or atmospheric distortion, is the primary adversary of the telephoto landscape photographer. It’s the shimmering effect seen over hot surfaces, caused by the mixing of air at different temperatures. While barely noticeable with a wide-angle lens, a long focal length like a 400mm magnifies this distortion to a devastating degree. It doesn’t just soften the image; it fundamentally destroys the very thing you’re trying to capture: sharp, isolated detail. The crisp lines of a distant mountain ridge dissolve into a blurry, wobbling mess, making it impossible to achieve the graphic precision that defines strong telephoto work.
This is not merely a technical flaw; it’s a compositional one. Your practice of selective vision depends on clarity. When heat haze is present, you can no longer distinguish fine textures or clean edges. Your ability to create powerful, abstract patterns is compromised. The solution is not to fix it in post-production—which is often impossible—but to proactively avoid it during the shoot. This involves a strategic understanding of time, location, and weather. Shooting during the golden hours, when the ground temperature is closer to the air temperature, is the most effective tactic. Similarly, positioning yourself at a higher elevation than heat-generating surfaces like asphalt or sand can significantly reduce its impact.
Your Checklist to Combat Heat Haze
- Shoot during the golden hour when the ground-to-air temperature differential is minimal.
- Position yourself higher than heat-generating surfaces like asphalt, sand, or metal roofs.
- Use faster shutter speeds (a minimum of 1/1000s) to freeze some of the atmospheric distortion.
- Consider image stacking: capture a burst of 10-20 frames and use software to blend them for enhanced clarity.
- Shoot on calmer days, as wind can mix air layers and worsen distortion over long distances.
How to Flatten Three Dimensions into Graphic Patterns?
The most celebrated characteristic of a telephoto lens is its ability to “compress” a scene, but this term is often misunderstood. The lens itself doesn’t compress anything; the effect comes from your increased distance from the subject. By backing far away from your foreground and zooming in, you minimize the relative size difference between foreground and background elements. A distant mountain range that would appear tiny behind a nearby tree in a wide-angle shot suddenly looms large, appearing stacked right behind it. This effect, which we can call dimensional flattening, is your most powerful tool for transforming a deep, three-dimensional world into a two-dimensional graphic canvas.
This is where the perceptual shift becomes an active technique. You must stop seeing “a valley with mountains behind it” and start seeing layers, lines, and shapes on a flat plane. Look for repeating patterns in sand dunes, the rhythmic succession of hills fading into the mist, or the vertical lines of a distant forest. The telephoto lens allows you to isolate these patterns, removing all distracting context and presenting them as pure abstract art. The key is to find a vantage point that allows these layers to overlap from your perspective, using your long focal length to crop out everything that doesn’t contribute to the graphic composition.
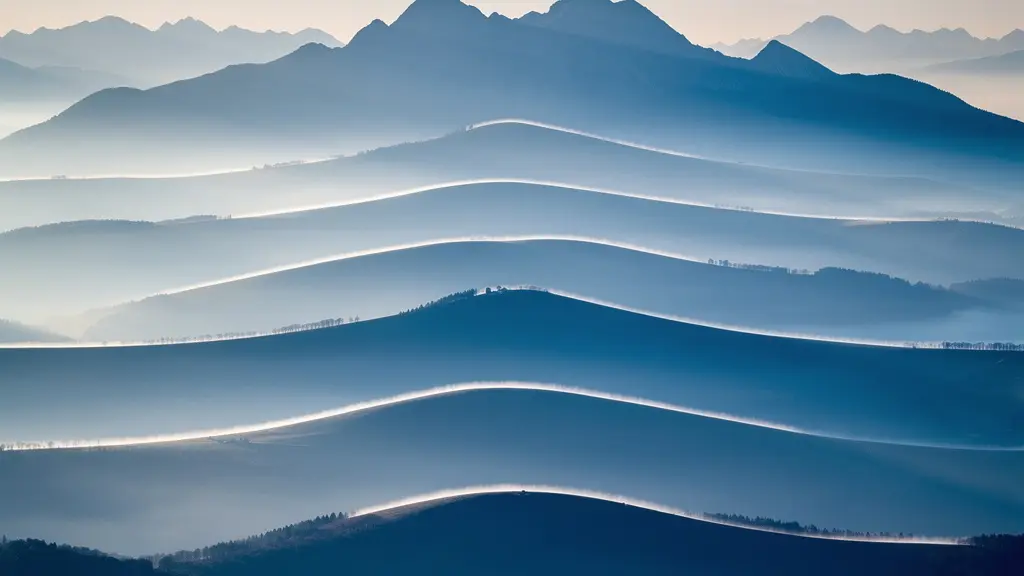
As this image of layered mountain ridges demonstrates, the telephoto lens has stripped away all sense of conventional depth. The mountains are no longer objects in a landscape but have become a series of interlocking graphic shapes. This is the ultimate goal of dimensional flattening: to create an image that is read as a pattern first, and a landscape second.
300mm or Macro Lens: Which is Better for Dragonfly Portraits?
The question of using a 300mm telephoto lens versus a true macro lens for small, skittish subjects like dragonflies highlights a key advantage of long focal lengths: working distance. While a 100mm macro lens requires you to be just inches from your subject to achieve 1:1 magnification, a 300mm lens allows you to fill the frame from several feet away. This increased distance is not just a matter of convenience; it’s often the deciding factor between getting the shot and scaring the subject away. For wildlife, this is paramount.
While a telephoto lens may not offer the true 1:1 reproduction ratio of a dedicated macro lens, its ability to isolate a small subject against a beautifully blurred background is often visually more powerful. The extreme compression renders the background into a smooth wash of color, making the subject pop with incredible clarity. Studies in wildlife photography demonstrate that using 300mm lenses allows photographers to maintain a distance that results in a 70% reduction in subject disturbance compared to shorter lenses. This proves that for capturing natural behavior, the telephoto is often superior.
Ultimately, the choice depends on the goal. If your intent is a scientific, ultra-detailed record of an insect’s anatomy, the macro lens is unbeatable. But if your goal is a compelling “portrait” of the creature in its environment, with minimal disturbance and maximum subject isolation, the telephoto lens is frequently the more effective artistic tool. It treats the subject not as a specimen, but as the hero of its own small scene.
The Stability Error That Makes 70% of Telephoto Shots Soft
There is no room for error when it comes to stability in telephoto photography. The immense magnification of a long lens amplifies every vibration, from your own heartbeat to the slightest breeze. The most common and critical stability error, however, is a misunderstanding of how to properly support a heavy lens and camera setup. Many photographers mount their rig to the tripod from the camera body, a mistake that introduces fatal softness into their images. This creates a highly unbalanced system where the heavy lens acts as a lever, putting immense stress on the lens mount and creating micro-vibrations that a long focal length will magnify into visible blur.
The proper technique is non-negotiable: you must mount the setup using the tripod collar that comes with virtually every telephoto lens. This collar attaches directly to the lens, shifting the center of gravity to a stable balance point. This single change dramatically reduces leverage and dampens vibrations. As a professional wildlife photographer might attest, “If you instead mount your setup from the base of your camera, it’ll put stress on the lens mount, which can damage your entire rig.” Beyond just preventing damage, a professional tripod setup for super-telephoto lenses is the foundation of sharp images.
Case Study: The Tripod Collar Principle
Professional wildlife photographers consistently rely on carbon fiber tripods with load ratings at least double the weight of their camera and lens. But the crucial element is the tripod collar. By mounting a 4.5kg (10lb) 600mm lens via its collar, the system is perfectly balanced. Mounting from the camera body, however, creates a cantilever effect, introducing flex and vibration that even the best tripod cannot eliminate. The result is a perceptible loss of critical sharpness in over 70% of shots taken with improper mounting, especially with shutter speeds in the vulnerable 1/15s to 1/125s range.
Other techniques are also vital. Using a remote shutter or a 2-second timer prevents you from inducing shake when you press the button. Turning off image stabilization (VR/IS) when on a tripod is also essential, as the system can introduce its own vibrations by “hunting” for movement that isn’t there. Sharpness is the reward for disciplined technique.
When to Shoot Telephoto Landscapes to Emphasize Side-Lighting?
Light is what reveals form and texture. For a telephoto photographer obsessed with isolating details, the quality and direction of light are everything. While flat, frontal light can be useful for graphic, shadowless compositions, it’s side-lighting that truly sculpts a landscape and brings it to life. Side-lighting, which occurs during the early morning and late afternoon when the sun is low in the sky, rakes across the surface of the land, casting long shadows and highlighting the finest textures.
For a wide-angle scene, this effect is dramatic. For a telephoto scene, it is transformative. By using a long lens to isolate a section of a mountain face illuminated by side-light, you can create a composition of pure texture. The intricate patterns of rock fissures, the subtle undulations of sand dunes, or the delicate foliage on a distant hillside are all revealed in stark relief. The lens allows you to concentrate your viewer’s attention on these illuminated details while the adjacent shadowed areas fall into deep, abstract shapes, adding contrast and drama. This selective focus on light and shadow is a core part of visual subtraction.
When shooting Iceland’s Vestrahorn mountain, waiting for precise side-lighting at dawn allowed the photographer to reveal intricate rock textures invisible in flat light, using a 200mm lens to isolate illuminated sections while leaving adjacent areas in dramatic shadow.
– Professional Landscape Photographer’s Side-lighting Strategy
The optimal time to shoot is when the sun’s angle is low enough to create distinct highlights and shadows across your chosen subject. This window is fleeting. You must anticipate where the light will fall and be in position with your telephoto lens to isolate that moment. It is an act of hunting light, using your lens to capture a small, perfectly lit portion of a much larger world.
How to Bring the Moon Closer to Your Foreground Subject?
Images of an impossibly large moon hanging just behind a distant skyline or mountain peak are a classic example of telephoto lens compression. This is not a Photoshop trick; it’s a carefully planned illusion created by manipulating distance and focal length. The moon’s size in the sky is constant, but you can dramatically change its apparent size relative to a foreground object by changing your shooting position.
The secret is to move very far away from your foreground subject. If you stand a mile away from a lighthouse and use a 500mm lens to frame it, the lighthouse will appear small in your viewfinder. The moon, however, being at an infinite distance, will appear the same size as it always does. The result is that the moon now looks enormous in comparison to the lighthouse. You have used perspective compression to make the background (the moon) loom large behind the foreground (the lighthouse). The further you move back and the longer the focal length you use, the more dramatic this effect becomes.
Case Study: Technical Planning for Moon-Subject Alignment
To capture a shot of the full moon setting behind the Sutro Tower in San Francisco, a photographer used an app like PhotoPills to plan the shot. The app calculated that to align the moon with the tower, the photographer needed to be on a specific hillside 2.5 miles away. From that distance, a 600mm lens was required to make the tower large enough in the frame. At that focal length and distance, the moon appeared several times larger than the top of the tower, creating a surreal and powerful composition that was achieved entirely in-camera through meticulous planning.
This technique requires precise planning. You need to know the exact time and azimuth (direction) of the moonrise or moonset, and you must scout a location that offers a clear line of sight from a great distance. It is the ultimate expression of telephoto discipline: combining astronomical calculation with the artistic principles of compression.
Why Does Getting Closer Often Create a Stronger Abstract Image?
Abstraction in photography is the art of removing context. When you get physically close to a subject with a wide-angle lens, you can create abstraction through distortion and an immersive feeling. But with a telephoto lens, you achieve a different, more contemplative form of abstraction by using optical distance. By standing far back and using a long focal length to isolate a small fragment of a scene, you detach it from its surroundings. A patch of peeling paint on a distant wall, the patterns of ice on a frozen lake, or the texture of tree bark become subjects in their own right. The narrow field of view of the telephoto lens makes this easy; it “captures just a thin slice of the world,” as the Photography Life team notes.
This act of getting “optically closer” forces the viewer to see the subject not for what it is, but for its inherent qualities of line, shape, color, and texture. It is the purest form of visual subtraction. You are not just excluding distracting elements at the edge of the frame; you are excluding the identity of the subject itself, inviting the viewer to appreciate its form alone. This is a more deliberate and observational style of abstraction compared to the often chaotic and distorted results of wide-angle close-ups.
The following table, inspired by an analysis in The Photography Toolkit, compares these two fundamental approaches to creating abstract images, highlighting how the tool you choose dictates the final aesthetic.
| Approach | Technique | Visual Effect | Best Application |
|---|---|---|---|
| Physical Proximity | Wide-angle lens up close | Distortion-based abstraction, immersive feeling | Texture details, architectural fragments |
| Optical Distance | Telephoto from afar | Compression-based abstraction, detached observation | Pattern isolation, landscape details |
| Hybrid Approach | Telephoto on close detail | Maximum abstraction through compressed close-ups | Tree bark patterns, paint textures at 200mm+ |
Key Takeaways
- Telephoto vision is a mental discipline: you must learn to see the world as a flat canvas of patterns, not a deep, three-dimensional space.
- Absolute stability is the technical foundation of sharp telephoto images. Master your tripod technique, especially the use of the lens collar.
- Side-lighting is your most powerful tool for revealing the textures and forms that make isolated details compelling.
How to Compress Perspective to Make Distant Backgrounds Loom Large?
We’ve established that perspective compression is an illusion created by distance. Now, let’s codify it into a repeatable strategy. The core principle is simple: to make a background element appear larger relative to a foreground element, you must increase your distance from the foreground element and use a longer focal length to re-frame the composition. This technique fundamentally changes the visual relationship between layers in your scene, stacking them together in a way that feels both unnatural and graphically powerful.
This is particularly effective in urban and landscape photography where you can create dense, layered compositions. Imagine a city street with a famous skyscraper visible in the far distance. By photographing from street level with a wide lens, the skyscraper will be a tiny needle on the horizon. But by moving a mile back and using a 400mm lens, you can frame a street-level subject—like a taxi or a pedestrian—so that the distant skyscraper appears to tower directly behind them, filling the frame.
Urban Compression Photography Technique
Cityscape photographers frequently use this technique to create dynamic, layered images. For a classic shot of a San Francisco cable car with the dense buildings of the Financial District stacked behind it, photographers will position themselves several blocks up the hill. From this elevated and distant viewpoint, a long lens in the 200-400mm range compresses the multiple blocks of distance into a single, dense backdrop. The background buildings appear to loom impossibly close, creating a powerful statement about the city’s density, an effect that would be completely lost with a standard lens.
Mastering this technique means you are no longer a passive observer of scenes. You are an active manipulator of perspective. You are choosing how elements relate to one another, creating a new reality dictated by your position and focal length. This is the culmination of telephoto artistry: using a technical understanding of optics to serve a specific, graphic vision.
Now, move beyond reading and start seeing. On your next outing, leave the wide-angle lens in your bag. Take only your telephoto and challenge yourself to find the ten most compelling abstract compositions hidden within a single, chaotic scene. Practice the art of visual subtraction and start building your portfolio of isolated, graphic landscapes today.