Successful transport of large-format art isn’t about thicker padding; it’s about mitigating the unseen forces of material physics and chemistry.
- Image softness on large prints is often due to a mismatch between resolution and viewing distance, not just megapixel count.
- The most common installation error—wire hanging—guarantees long-term bowing in large acrylic prints due to concentrated point loading.
Recommendation: Prioritize distributed weight systems (like French cleats) for hanging and always factor in material-specific chemical curing times before framing or transport to prevent permanent damage.
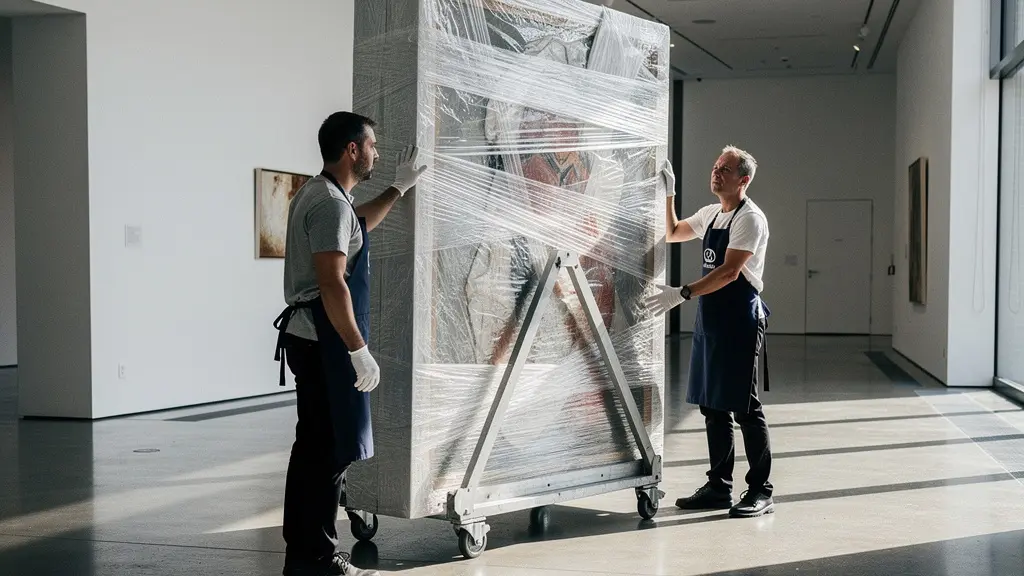
There is a unique power in a large-format photograph that fills an entire wall. It transforms a space, creating an immersive experience that a smaller print cannot replicate. For collectors and gallerists, acquiring such a piece is an investment in impact. However, with great size comes great fragility. The logistics of moving and installing a print over 60 inches wide are fraught with risks that go far beyond a simple crack or scratch. The common advice to “build a sturdy crate” or “hire a professional” is correct, but it fails to address the core of the problem. It outsources the knowledge without empowering the owner.
The real challenge lies not in the visible handling, but in the unseen forces at play. What if the key to preventing damage wasn’t just about padding, but about understanding the molecular-level process of ink curing? Or realizing that a pristine print can be slowly ruined by the simple, constant pull of gravity after it’s hung on the wall? This is the domain of the specialized art handler, whose expertise is rooted in a deep, practical understanding of material science, structural physics, and chemical stability. It’s about anticipating problems before they become catastrophes.
This guide demystifies that expertise. We will move chronologically through the life of a large-format print, from the digital file’s inherent limitations to the crucial choice of substrate and presentation. We will dissect the most common and disastrous installation error and explain the science behind it. By the end, you won’t just know *what* to do; you will understand *why* you are doing it, enabling you to protect your investment with the foresight of a seasoned professional.
To navigate these critical considerations, this article is structured to address each potential point of failure. The following table of contents outlines the specialist’s protocol for ensuring your large-format artwork arrives and remains in perfect condition.
Table of Contents: A Specialist’s Protocol for Handling Oversized Art
- Why Does a 40-Megapixel Image Look Soft at 2 Meters Wide?
- How to Choose Between Dibond and Aluminum for Structural Rigidity?
- Framing vs. Face-Mounting: Which Is More Cost-Effective for Large Art?
- The Hanging Error That Causes Large Plexiglass Prints to Bow
- When to Order Your Large Prints to Ensure They Cure Before the Show?
- Why Are Oversized Prints Replacing Traditional Gallery Walls in Modern Homes?
- Why Do You Need More Than “Focus on Infinity” for Sharp Landscapes?
- How to Apply Output Sharpening Based on Viewing Distance?
Why Does a 40-Megapixel Image Look Soft at 2 Meters Wide?
The first point of failure for a large print often occurs before a single drop of ink is laid down. A collector might invest in a piece shot on a high-resolution 40-megapixel camera, only to find the final two-meter-wide print looks disappointingly soft. The culprit is rarely the camera itself, but a misunderstanding of perceptual sharpness. Sharpness is not an absolute value; it’s a relationship between image resolution, print size, and the distance from which it is viewed. An image that looks perfectly crisp on a monitor is being viewed at a very high resolution relative to its size. When that same image is enlarged to fill a wall, the viewer stands further back. The eye’s ability to resolve detail decreases with distance, meaning the print needs to be sharpened specifically for that viewing context.
Simply increasing the dots per inch (DPI) is a common but flawed solution. For massive prints, a lower DPI like 180 is often sufficient and preferable to artificially inflating a file. The professional approach is to apply three-zone output sharpening. This technique involves creating different sharpening levels for the foreground, mid-ground, and background of the image. The foreground, which the eye is drawn to first, receives the most sharpening to enhance texture and detail. The mid-ground receives a moderate amount, while the background is sharpened least to maintain a natural sense of depth and atmospheric perspective. This mimics how the human eye perceives a real-world scene and guides the viewer’s focus, creating a perception of overall sharpness that a single global adjustment cannot achieve. Always insist on test strips printed on the final paper to evaluate this effect before committing to the full-scale piece.
How to Choose Between Dibond and Aluminum for Structural Rigidity?
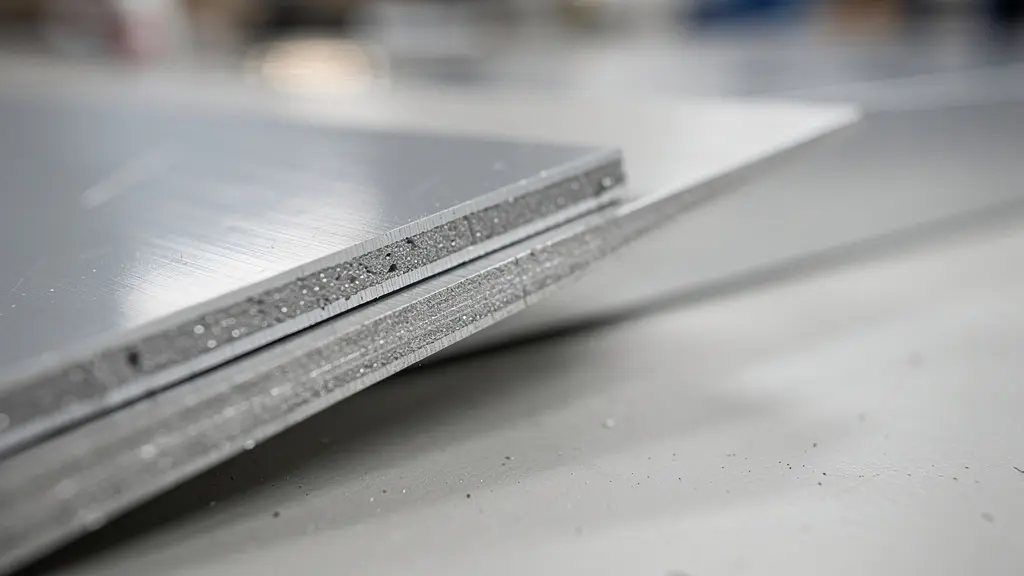
Once the digital file is optimized, the next critical decision is the substrate—the physical foundation of the print. For large-format works, the choice typically comes down to solid aluminum versus an aluminum composite material (ACM) like Dibond. While both offer a sleek, modern aesthetic, their physical properties are vastly different, with significant implications for transport and longevity. The core issue is balancing structural rigidity with weight. A large print must resist flexing and bowing under its own weight, but excessive weight dramatically increases the complexity and cost of shipping and installation.
Solid aluminum is heavier and transfers vibrations and thermal changes directly, making it more susceptible to dings or warping from temperature fluctuations during transit. Dibond, by contrast, features a lightweight polyethylene core sandwiched between two thin sheets of aluminum. This structure provides excellent rigidity at a fraction of the weight and offers superior vibration dampening, absorbing shocks that could damage a solid panel. The composite nature of Dibond also helps to buffer thermal expansion, making it more stable in environments with changing temperatures. The choice of hanging system is also a factor; solid aluminum’s density can handle point loading better, but the best practice for any large piece is a subframe that distributes weight, a requirement for Dibond.
The following table breaks down the key differences, highlighting why Dibond is often the superior logistical choice for oversized prints that will be transported and installed.
| Property | Dibond (ACM) | Solid Aluminum |
|---|---|---|
| Thickness | 3-4mm standard | 2mm typical |
| Weight | Lighter (polyethylene core) | Heavier |
| Vibration Dampening | Better (PE core absorbs) | Transfers more shock |
| Cutting Requirements | Hand knife + straight edge | Special tools needed |
| Thermal Behavior | Composite dampens expansion | Direct expansion transfer |
| Hanging System | Requires full subframe | Can handle point loading better |
Framing vs. Face-Mounting: Which Is More Cost-Effective for Large Art?
The presentation method directly impacts not only the aesthetic of a large-format piece but also its long-term cost and safety in transit. The two primary options are traditional framing behind museum glass and modern acrylic face-mounting. At first glance, face-mounting often appears to be the more cost-effective choice, as the initial fabrication can be 30-40% less than a custom frame with high-quality, anti-reflective glass. However, a professional handler or gallerist must consider the total cost of ownership, which extends far beyond the initial price tag. Shipping is a major factor; traditional frames are heavy and bulky, often adding 40-60% more weight and requiring custom crates that can add hundreds of dollars to each shipment.
However, the exposed surface of a face-mounted print introduces other costs. As a case study from WhiteWall’s analysis on aluminum-mounted prints highlights, these pieces may carry higher insurance premiums due to their vulnerability to scratches. A crucial consideration is reversibility and conservation. A traditionally framed photograph can be removed for conservation or reframed to suit a new decor. A face-mounted print is permanently bonded to the acrylic, meaning any significant surface damage often requires a complete reproduction of the artwork. Solutions like aluminum Dibond prints with a UV protective laminate offer a compelling middle ground, providing a durable, lighter-weight option with a guaranteed long lifespan and a mounting system that can be more easily conserved than a permanent face-mount.
Your Checklist for Evaluating Total Presentation Cost
- Initial Investment: Compare the upfront cost of face-mounting versus museum-grade framing for your specific print size.
- Shipping Logistics: Calculate the added weight and crating costs for a framed piece versus a lighter face-mount.
- Insurance Implications: Consult your insurer to see if an unprotected face-mount increases premiums for transit and display.
- Conservation Value: Assess the importance of reversibility. Can the artwork be separated from its mount for future repairs or resale?
- Repair Scenarios: Price out the cost of replacing damaged museum glass versus the cost of completely reprinting and mounting a damaged face-mount.
The Hanging Error That Causes Large Plexiglass Prints to Bow
Perhaps the most insidious damage to a large-format print occurs slowly, silently, and long after the installers have left. A perfectly flat, rigid piece of face-mounted acrylic can, over months or years, develop a noticeable sag or bow. This is not a material defect; it is a failure of physics caused by the single most common installation mistake: using a picture wire. While perfectly acceptable for smaller, lighter works, a wire hanging system is a guaranteed method for ruining a large print. The reason lies in the difference between distributed loading and point loading. A wire concentrates the entire weight of the piece onto two small points on the subframe.
This concentrated point loading creates constant, uneven stress on the substrate. As professional framers confirm, this concentrated loading through wire systems is the primary cause of deformation in large-format works. Gravity relentlessly pulls on the unsupported center and bottom edges of the print, causing the material to slowly succumb to a phenomenon known as gravitational bowing. The acrylic, while rigid, is not infinitely strong and will deform over time under this focused strain. The only correct way to hang a large or heavy piece of art is with a system that provides uniform support across the entire top edge.

The professional standard is a French cleat system. This method uses two interlocking rails—one mounted to the wall and one to the back of the artwork’s subframe. When hung, the weight is distributed evenly across the entire length of the cleat. This eliminates stress points and ensures the piece remains perfectly flat against the wall indefinitely. Insisting on a cleat system is non-negotiable for any print over 40 inches in width.
When to Order Your Large Prints to Ensure They Cure Before the Show?
A hidden risk in the timeline of preparing for an exhibition is the chemical process of print curing, often referred to as outgassing. After a large-format photograph is printed, residual solvents and moisture from the inks and paper must fully evaporate before the piece can be safely framed or face-mounted. If a print is sealed behind glass or acrylic too early, these evaporating solvents become trapped. They can create a hazy film on the inside of the glazing (known as “ghosting”) or, worse, cause the print to physically adhere to the acrylic, leading to permanent damage. The time required for this process varies dramatically based on the technology used.
As the table below illustrates, a pigment inkjet print on a glossy or RC (resin-coated) paper can take one to two weeks to fully cure, especially in humid environments. In contrast, dye-sublimation on metal or UV-cured prints on Dibond are stable almost immediately. This timeline must be factored into any production schedule. Rushing a print to the framer to meet a deadline is a recipe for disaster. Professional printmakers have developed protocols to manage this, such as the newsprint absorption method detailed in a professional forum case study. This involves laying absorbent newsprint over a fresh print for 24-48 hours to draw out solvents, significantly reducing the standard curing time. This is especially critical in high-humidity locations where prints can reabsorb atmospheric moisture even after they feel dry to the touch.
| Print Technology | Paper Type | Minimum Cure Time | Humidity Impact |
|---|---|---|---|
| Pigment Inkjet | Matte Cotton Rag | 24-48 hours | Minimal |
| Pigment Inkjet | RC/Glossy | 1-2 weeks | Significant |
| Pigment Inkjet | Baryta | 3-5 days | Moderate |
| Dye Sublimation | Metal | Immediate | None |
| UV-Cured | Dibond | Immediate | None |
| Lambda/LightJet | Photo Paper | 48-72 hours | High |
Why Are Oversized Prints Replacing Traditional Gallery Walls in Modern Homes?
The increasing prevalence of large-format photography in collections and modern interiors isn’t just a trend; it’s a fundamental shift in how we interact with art in a space. Traditional gallery walls, with their collections of smaller, disparate pieces, create a busy visual narrative. In contrast, a single, oversized print acts as a “hero” piece—an architectural anchor that defines the character of an entire room. This approach aligns perfectly with modern architectural trends that favor open-plan living, high ceilings, and minimalist aesthetics. A large print can command a large wall without creating the visual clutter of multiple frames, providing a singular, powerful focal point.
The impact is about more than just decoration; it’s about spatial transformation. As an industry guide from Signs New York notes, “The sheer size of large-format prints grabs attention immediately – they can transform any space into a vibrant advertisement or message platform.” This transformative power is exemplified in large-scale public projects, which often pioneer trends that filter into the residential market. A compelling case study is the 2021 renovation of LaGuardia Airport’s terminal, where Color X installed immense 44-foot tall vinyl panels. This project demonstrates how a single, monumental image can create a more profound and immersive art experience than a wall of smaller works. For a collector, a single oversized piece offers maximum impact, turning a simple wall into a statement of intent and a window into another world.
The sheer size of large-format prints grabs attention immediately – they can transform any space into a vibrant advertisement or message platform.
– Signs New York, Large Format Printing Solutions Guide
Why Do You Need More Than “Focus on Infinity” for Sharp Landscapes?
For landscape photographs destined for large-scale printing, achieving edge-to-edge sharpness is paramount. Many photographers rely on the simple technique of focusing to infinity, often combined with a small aperture like f/16 or f/22 to maximize depth of field. This approach is fundamentally flawed for high-resolution printing. Firstly, relying on a small aperture introduces lens diffraction, a physical phenomenon that actually softens the entire image, counteracting the goal of achieving sharpness. Secondly, for a vast landscape with important foreground elements, even the maximum depth of field at an optimal aperture (typically f/8-f/11) is often insufficient to render both the nearest flower and the distant mountains with critical sharpness. This might not be noticeable in a small print, but when enlarged to two meters, the soft foreground or background becomes glaringly obvious.
The expectation of sharpness is also a factor. As professional testing demonstrates, even 8-10 megapixel cameras can produce acceptably sharp 30-inch prints when viewed from an appropriate distance. For a massive print, every detail is scrutinized, demanding a higher level of source file integrity. The professional solution to this problem is focus stacking. This meticulous workflow involves capturing multiple frames of the same scene, each focused on a different plane, from the immediate foreground to the far background. These images are then merged in post-production software to create a single composite image that is perfectly sharp throughout. This technique is the secret behind many of the breathtakingly detailed large-format landscape prints seen in galleries.
- Capture multiple images at different focal points from the nearest foreground element to infinity.
- Use an optimal aperture of f/8-f/11 to maximize sharpness and minimize diffraction.
- Ensure a 30% overlap between the focus zones of each shot for seamless blending.
- Use specialized focus stacking software to combine the sharpest parts of each image into a final composite.
- Perform test prints of small sections at 100% magnification to verify sharpness before committing to the full-size print.
Key Takeaways
- The primary cause of bowing in large prints is improper hanging (wire systems) which creates concentrated stress points.
- Print materials require a chemical “curing” or “outgassing” period; framing too early can cause permanent damage like haze or adhesion to the glass.
- Print sharpness is relative; it must be optimized for viewing distance using techniques like three-zone sharpening, not just high DPI.
How to Apply Output Sharpening Based on Viewing Distance?
The final, critical step in preparing a file for a large-format print is applying output sharpening. This is distinct from the initial capture sharpening and must be tailored to two variables: the print size and the intended viewing distance. The goal is to create a file that looks perfectly sharp to a person standing a specific distance away. A print meant to be viewed from ten feet away requires a fundamentally different sharpening algorithm than one viewed from two feet away. Applying the wrong sharpening can result in an image that looks crunchy and over-processed up close or remains soft from a distance.
The science behind this is based on the resolving power of the human eye, which can be translated into a required PPI (pixels per inch) for a given viewing distance. While screen representation is notoriously inaccurate for judging print sharpening, professional printers rely on formulas and, most importantly, test strips. Creating a small print of a critical section of the image at 100% of the final size is the only way to be certain. For instance, an 80-inch panoramic print viewed from 10 feet may only require a file with 30 PPI to appear perfectly sharp, whereas a 13×19 inch print viewed from two feet needs around 280 PPI. Attempting to print the 80-inch piece at 280 PPI would not only create an unmanageably large file but could also introduce artifacts without any perceptual benefit.
The following table, based on data from an in-depth analysis of viewing distances, provides a clear guide for determining the minimum required resolution for various print sizes.
| Print Size | Typical Viewing Distance | Minimum DPI Required | Formula Applied |
|---|---|---|---|
| 13×19 inches | 2-3 feet | 280 ppi | 3438/viewing distance |
| 20×30 inches | 4.5-6 feet | 64 ppi | 3438/54 inches |
| 40×60 inches | 7-9 feet | 40 ppi | 3438/85 inches |
| 80 inch panoramic | 10-12 feet | 30 ppi | 3438/120 inches |
To ensure the longevity and value of your collection, the next logical step is to audit your current storage and display methods against these principles. Begin by assessing your highest-risk pieces today.