Contrary to popular belief, achieving sharpness in massive prints is not about smaller apertures, but about mastering the physics of how sharpness scales.
- The perceived sharpness of an image fundamentally changes with print size and viewing distance, a concept often ignored by standard depth of field rules.
- Stopping down to f/22 or smaller often introduces more softness through diffraction than it solves, especially on prints measured in meters.
Recommendation: Instead of relying on aperture alone, learn to manipulate the plane of focus using camera movements and understand when focus stacking is a superior technical solution.
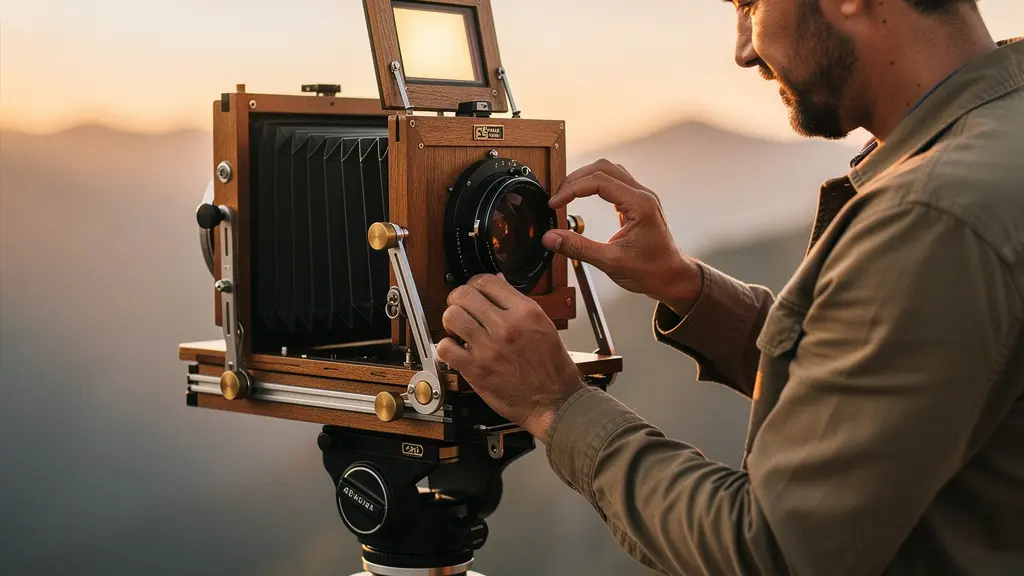
For the large format photographer, there is a moment of profound disappointment that is all too common. You capture an image with what appears to be a perfectly managed, shallow depth of field on the ground glass. The subject is crisp; the background melts away. Yet, when that same image is printed two meters wide for a gallery wall, it looks inexplicably soft, its magic lost in the translation to scale. The immediate impulse is to blame the lens or the focus, but the real issue is far more fundamental and often misunderstood. Many photographers believe the solution lies in simply stopping down the aperture to f/32 or f/64 to gain more depth, or they rely on outdated hyperfocal distance charts designed for 35mm film.
This approach is a critical error. The challenge of fine art printing at scale isn’t just about getting more “in focus.” It’s a technical discipline rooted in the physics of light, optics, and perception. The very definition of “sharp” changes as an image grows. The subtle softness of a background that looks pleasing on a small screen can become a blurry, distracting mess on a large print, while details that seemed tack-sharp can dissolve into a low-contrast haze. The key isn’t to fight for more depth of field, but to control it with precision.
This guide moves beyond the platitudes of “focus one-third in” or “just use f/22.” We will deconstruct the science behind perceived sharpness at scale. You will learn why your digital-era instincts about depth of field often fail in the analog-scale world of large format. We will explore how to manipulate the plane of focus with camera movements, understand the catastrophic impact of diffraction on large prints, and determine when a multi-frame technique is the only way to achieve your artistic vision without technical compromise. The goal is to give you the control to make your prints as impactful as the scene you first envisioned.
This article provides a structured path to mastering this complex subject. From the fundamental physics of focus to advanced techniques, each section builds on the last to provide a complete framework for achieving unparalleled sharpness in your large format prints.
Summary: A Technical Guide to Large Format Print Sharpness
- Why Do You Need More Than “Focus on Infinity” for Sharp Landscapes?
- How to Tilt the Plane of Focus to Stretch Sharpness?
- f/1.2 or f/8:How to Achieve Tonal Depth That Rivals Darkroom Prints Digitally?
- The Small Aperture Mistake That Makes Your f/22 Shots Soft
- When to Shoot 10 Frames Instead of One for Perfect Detail?
- Why Does a 40-Megapixel Image Look Soft at 2 Meters Wide?
- Why Does Sensor Size Actually Affect Depth of Field?
- How to Optimize a Small Home Shooting Space for Professional Results?
Why Do You Need More Than “Focus on Infinity” for Sharp Landscapes?
The core misunderstanding for photographers moving to large format is assuming that sharpness is an absolute. It is not. Sharpness is relative to the final output size and viewing distance. The “focus on infinity” or simple hyperfocal distance rules you learned for smaller formats fail because they are based on a fixed assumption about the circle of confusion (CoC). The CoC is the maximum size a point of light can be on the film or sensor before it is perceived as unsharp by the human eye. For a small 8×10 inch print, this tolerance is relatively large. But when you enlarge that same 4×5 negative to a 2-meter wide print, that same “acceptable” circle of confusion becomes a large, soft blotch.
This is the scaling anomaly: what is sharp for one size is soft for another. Therefore, a successful large format print demands a print-aware focusing strategy. You cannot just focus on a single point and hope for the best. You must calculate the required depth of field for the *final print size*. According to optical physics principles, the acceptable circle of confusion for a 4×5 format intended for a massive print is significantly smaller than what standard calculators suggest. This requires you to reconsider your entire focusing methodology, moving from a single point of focus to managing a “zone of sharpness” that is defined by the viewer’s experience of the final piece.
The process involves measuring the nearest and furthest points you need to be critically sharp and using a specific depth of field calculator that allows you to input your format and intended enlargement factor. This is not about getting everything in focus; it’s about controlling precisely which planes are sharp enough to withstand massive enlargement, creating a deliberate and perceived sharpness that holds up under close inspection in a gallery setting.
How to Tilt the Plane of Focus to Stretch Sharpness?
When faced with a scene that requires extensive front-to-back sharpness, such as a landscape with a compelling foreground element stretching to a distant mountain, the small-format photographer’s only tool is a smaller aperture. The large format photographer, however, has a far more powerful and elegant solution: plane manipulation. By using the camera’s front tilt movement, you can pivot the plane of focus so that it is no longer parallel to the film plane. This is governed by the Scheimpflug principle, which states that the lens plane, the film plane, and the plane of sharp focus all intersect at a single line.
In practical terms, if you have a subject that is angled away from the camera (like a road receding into the distance or a flower bed on the ground), you can tilt the lens forward. This angles the plane of focus downwards, allowing it to align with the subject. The result is an extraordinary depth of field that can keep a scene sharp from inches in front of the lens to infinity, all without resorting to diffraction-inducing small apertures. This technique is what gives many classic large format landscapes their impossible, all-encompassing sharpness. It is not an optical trick but a fundamental control over the geometry of focus.
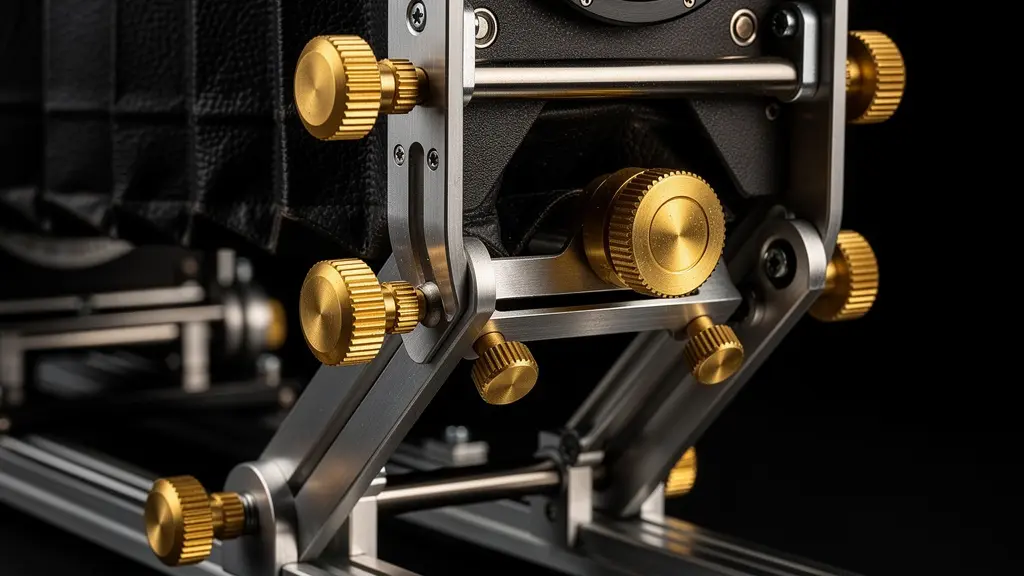
As the illustration demonstrates, the physical tilt of the lens standard directly realigns the field of sharpness. This isn’t just for landscapes; it’s a creative tool for sculpting focus in any genre.
Case Study: Creative Focus in Portraiture
Professional photographers use front tilt to control the plane of focus creatively. When tilted back, the plane of focus tilts accordingly, allowing selective sharpness—for example, keeping a subject’s eyes sharp while deliberately softening their shoulders. This technique is particularly effective for portraits and still life, creating a unique ‘large format look’ that is impossible to replicate with smaller formats. It allows for simultaneous subject isolation and deep contextual detail.
f/1.2 or f/8:How to Achieve Tonal Depth That Rivals Darkroom Prints Digitally?
The “large format look” is often characterized by an almost surreal separation of the subject from the background. This three-dimensional quality comes from the unique combination of a very thin plane of focus and the incredible detail captured by the large film area. However, achieving this look while maintaining technical excellence is a balancing act. The choice of aperture is not simply a matter of depth of field; it is a critical decision that affects micro-contrast and tonal separation. Every lens has an aperture “sweet spot,” typically two to three stops down from wide open, where it performs at its absolute peak sharpness and delivers the best acutance (edge contrast).
For most large format lenses, this peak performance range is between f/11 and f/16. In this range, the lens resolves the finest details and creates a palpable sense of depth and texture. As you stop down further to gain more depth of field, you begin to trade this “pop” for a flatter, more uniform sharpness. While apertures like f/32 or f/45 can render a vast scene in focus, they do so at the cost of the vivid, three-dimensional rendering that makes large format so compelling. The tonal transitions become less subtle, and the image can lose its ‘life’.
This is a critical distinction from digital photography, where algorithms often compensate for lens imperfections. With large format, what the lens projects onto the film is what you get. An expert printer understands how to use the aperture to achieve the desired creative effect, balancing the need for depth of field with the lens’s peak performance for optimal tonal depth.
| Aperture Range | Primary Use | Sharpness Characteristic | Creative Effect |
|---|---|---|---|
| f/11-f/16 | Peak lens sharpness | Maximum micro-contrast and detail | Superior 3D separation on main subject |
| f/16-f/22 | Standard working apertures | Balanced sharpness across frame | Natural depth with good subject isolation |
| f/22-f/45 | Maximum depth of field | Slight diffraction softening | Flatter but deeper field of focus |
| f/32-f/64 | Extreme DOF needs | Noticeable diffraction on large prints | Very flat rendering, loss of tonal pop |
The unique rendering capability of large format is something even the best digital systems struggle to emulate. As noted by Usman Dawood in a comparison for PetaPixel:
Currently, no digital camera—including medium format—is going to be able to produce this type of image with this kind of depth of field. The background just melts away, and Lucy’s face just looks… almost surreal in terms of the way that it’s been rendered.
– Usman Dawood, PetaPixel – Full-Frame Digital vs Large Format Film Comparison
The Small Aperture Mistake That Makes Your f/22 Shots Soft
The instinct to stop down to a very small aperture like f/32, f/45, or even f/64 to maximize depth of field is the single most common mistake that leads to soft large-format prints. This introduces a destructive optical phenomenon known as diffraction. Diffraction occurs when light waves pass through a small opening (the aperture) and begin to spread out, interfering with each other. The smaller the aperture, the more pronounced this effect becomes. Instead of focusing to a sharp point, the light spreads into a soft disc, robbing the image of critical detail and acutance.
While diffraction affects all formats, it becomes a diffraction catastrophe at the scale of fine art printing. On a small screen or an 8×10 print, the softness from diffraction at f/32 might be negligible. But when enlarged to two meters, that slight softness becomes a detail-destroying blur that no amount of sharpening can recover. According to large format photography experts, most 4×5 lenses are diffraction limited past f/22, meaning any smaller aperture will produce a theoretically less sharp image. For gallery-sized prints, this limit is often closer to f/16.
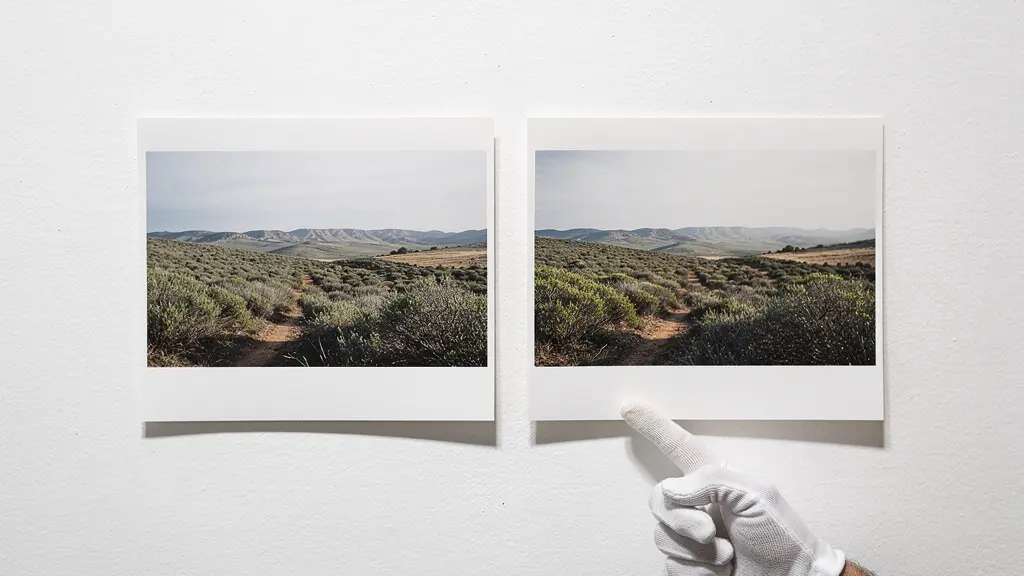
The visual evidence is undeniable when comparing prints. A section of an image shot at f/16 will exhibit crisp, clear details, while the same image shot at f/64 will appear muddy and lack definition. Relying on small apertures is a losing strategy for large prints.
Case Study: The Impact of Print Size on Diffraction
When enlarging images to gallery sizes (2-3 meters wide), diffraction that appears negligible on screen becomes catastrophically detail-destroying. Professional large format photographers report that diffraction at f/64 results in unacceptable softness for prints larger than 1 meter, making camera movements and focus stacking superior solutions for achieving deep focus without sacrificing critical sharpness. The physical limits of light simply cannot be ignored at this scale.
When to Shoot 10 Frames Instead of One for Perfect Detail?
When both camera movements and optimal apertures are insufficient to achieve the required depth of field without inducing diffraction, the master printer turns to a final, powerful technique: focus stacking. This method, borrowed from the digital world but perfectly applicable to film, involves capturing multiple frames of the same scene, each focused on a different plane, and then digitally blending them in post-production. Instead of trying to get everything sharp in one capture, you create a series of “sharp slices” that are later composited into a single image with seemingly infinite depth of field and zero diffraction compromise.
This is the “shoot 10 frames instead of one” approach. For a complex landscape, you might take one shot focused on the immediate foreground, another on the mid-ground, a third on the distant mountains, and so on. For macro work, this could involve dozens of frames. The key is to shoot each frame at the lens’s optimal aperture (e.g., f/11 or f/16) to ensure maximum acutance and micro-contrast in every slice. When combined, the final image possesses a level of detail and front-to-back sharpness that is physically impossible to capture in a single exposure.
While this technique requires meticulous execution on a tripod and significant post-processing work, it is the ultimate solution for scenes demanding extreme depth of field. It allows the photographer to completely bypass the physical limitations of diffraction. It separates the act of capturing detail from the act of managing depth, allowing you to optimize for both independently. For the most demanding fine art applications, where every pixel of detail matters across a massive print, focus stacking is not a compromise; it is the technically superior method.
Why Does a 40-Megapixel Image Look Soft at 2 Meters Wide?
In the digital era, photographers are conditioned to equate megapixels with quality. This is a dangerous oversimplification, especially in the context of large-scale printing. A 100-megapixel medium format digital file can easily look softer than a well-executed 4×5 film scan (equivalent to roughly 40-80 megapixels) when printed large. The reason is not resolution, but acutance. Acutance is the objective measurement of edge contrast—how sharply and distinctly one tone transitions to another. A print with high acutance appears “sharp,” “crisp,” and “three-dimensional,” even if its ultimate resolving power is lower.
Factors like lens quality, format size, and, most importantly, diffraction have a far greater impact on acutance than megapixel count. A 100MP shot taken at f/32 will be ravaged by diffraction, resulting in low acutance. Its edges will be soft and muddy, a flaw that becomes glaringly obvious on a large print. In contrast, a 4×5 film photograph taken at its optimal aperture of f/16 preserves high acutance. Even if it resolves slightly fewer lines per millimeter, its crisp edges give the print a “pop” and a perception of superior sharpness. While recent advances in printing technology show that contemporary inkjet printers can print at over 2800 dots per inch (dpi), they can only reproduce the data they are given. If the source file has low acutance, the print will be soft, regardless of the printer’s resolution.
Case Study: Resolution vs. Acutance in Practice
Professional large format photographers emphasize that a perfectly executed 40MP-equivalent shot at f/11 will be infinitely sharper in a large print than a 100MP shot at f/32, due to diffraction’s effect on acutance. The working apertures for 4×5 format are typically between f/16 and f/32, where diffraction isn’t a major issue, allowing for both detail and reasonable depth of field in gallery-sized prints. This highlights that technique and understanding optics are more critical than raw pixel count.
The pursuit of sharpness in large prints is therefore a pursuit of acutance. This means using the best lenses at their optimal apertures and avoiding diffraction at all costs, rather than chasing the highest possible megapixel count.
Why Does Sensor Size Actually Affect Depth of Field?
It’s a well-known axiom that larger formats produce a shallower depth of field. But the “why” is often misunderstood. The effect is not an inherent property of the format itself, but a consequence of how you use it. To achieve the same field of view or framing on a larger sensor or piece of film, you must either use a longer focal length lens or move closer to your subject. Both of these actions fundamentally reduce the depth of field for a given aperture.
For example, a “normal” 50mm lens on a 35mm camera has a wide depth of field at f/8. The equivalent “normal” lens for a 4×5 camera is around 150mm. At the same f/8 aperture and subject distance, the 150mm lens will produce a dramatically shallower depth of field. This physical reality is the source of the large format “look.” It forces a separation between subject and background that smaller formats can only approximate with ultra-fast f/1.2 or f/1.4 lenses, which often come with their own optical compromises.
However, this characteristic is more than just “shallower DoF.” It’s about the quality of that out-of-focus rendering (bokeh) combined with the immense detail captured on the in-focus plane. This duality is what creates the signature aesthetic. As one analysis notes:
It’s not just shallower DoF; it’s the unique ability to achieve extreme subject isolation and extreme detail simultaneously, something smaller formats cannot replicate. This creates the signature three-dimensional quality.
– Large Format Photography Community, Analysis of Large Format Aesthetic Characteristics
Understanding this relationship is key to wielding the format’s power. You are not simply getting less in focus; you are gaining an unparalleled tool for directing the viewer’s eye and creating a sense of presence and dimensionality that is the hallmark of masterfully executed large format photography.
Key Takeaways
- Sharpness is relative: The definition of “sharp” changes with print size and viewing distance, making standard DoF rules obsolete for large prints.
- Manipulate the plane: Use camera tilts and swings to align the plane of focus with your subject, achieving vast depth of field without small, diffraction-inducing apertures.
- Diffraction is the enemy: Stopping down past f/22 actively destroys detail on large prints. Prioritize optimal apertures (f/11-f/16) and use other techniques for depth.
- Acutance trumps resolution: The perceived sharpness of a print comes from edge contrast (acutance), not just megapixel count. Good technique at f/16 is better than a high-res shot at f/32.
How to Optimize a Small Home Shooting Space for Professional Results?
Applying the principles of large format depth of field management is not limited to grand landscapes. These techniques are equally critical—and often more challenging—in the constrained environment of a home studio. When shooting still life, portraits, or product work in a small space, you are often working very close to your subject, which naturally creates an extremely shallow depth of field. Here, camera movements become your primary tool for success.
Instead of placing lights and moving your subject to fit the camera’s limitations, you use the camera’s movements to adapt to the scene. For a tabletop product shot, a slight front tilt can bring an entire object into sharp focus from front to back, even at a wide aperture like f/11. This preserves the beautiful tonal separation and avoids the flat, lifeless look that would result from stopping down to f/45. Similarly, a slight swing can keep a series of objects on a table sharp as they recede from the camera at an angle.
The key in a small space is to make small, incremental adjustments. Use a loupe to check focus on the ground glass at multiple points after each minor tilt or swing. The goal is to use the absolute minimum amount of movement necessary to achieve the desired sharpness. This precise, methodical approach allows you to create images with a level of technical control and aesthetic quality that would be impossible with a fixed-body camera, turning the limitations of a small space into an opportunity for deliberate, crafted photography.
Action Plan: Mastering Depth of Field in Confined Spaces
- Position camera as far back as space allows to minimize extreme perspective and create more working distance.
- Use front tilt to achieve front-to-back sharpness on tabletop subjects without resorting to extreme, diffraction-inducing apertures.
- Apply base tilt adjustments incrementally, using a loupe to refocus and check critical sharpness on the ground glass with each micro-movement.
- Create seamless backgrounds by carefully aligning the backdrop’s plane with the angle of your camera’s tilt to maintain focus across the entire scene.
- Test focus at multiple points (near, middle, far) on your subject using a high-magnification loupe against the ground glass to confirm the focus plane is correctly placed.
By moving beyond simple aperture adjustments and embracing the technical and physical principles of optics, you can take full control over your large format prints. The path to a stunning, gallery-quality print is not one of compromise, but one of precise, intentional mastery over the physics of light. Begin applying these strategies today to transform your large-scale work from soft and disappointing to critically sharp and breathtaking.