The key to creating three-dimensional depth is to stop thinking about composition and start thinking like a sculptor, using light and atmosphere to physically carve out space in your frame.
- Backlighting and rim lights don’t just highlight a subject; they chisel it away from the background, creating a tangible layer of separation.
- Color is a spatial tool. Warm colors advance towards the viewer while cool colors recede, allowing you to push and pull visual planes.
- Atmospheric haze isn’t a flaw; it’s a medium. By lighting the air itself, you create visible, volumetric layers that define distance.
Recommendation: Instead of asking “what’s in my foreground?”, ask “how does the light travel through the volume of air between my lens and my background?”
Your images feel flat, trapped in their two dimensions. You’ve followed the rules—placed an object in the foreground, used a wide aperture—but the result still lacks that immersive, cinematic quality. The common advice focuses on compositional tricks, treating the frame like a flat collage. But what if the secret isn’t in arranging objects, but in sculpting the very space between them? What if you could treat light not just as illumination, but as a physical substance that occupies volume, and atmosphere not as a void, but as a dense, tangible medium?
This is the cinematographer’s approach. It moves beyond simple depth of field and into the realm of volumetric depth perception. Think of the mesmerizing sunbeams filtering through the vast windows of Grand Central Terminal in the 1930s; it was an awe-inspiring spectacle of light and shadow dancing within the walls, making the air itself visible. This is the goal: to make the z-axis—the dimension of depth—not just implied, but felt. This guide abandons the simple checklist in favor of a deeper understanding. We will explore how to physically separate layers with backlighting, how to use color temperature to push and pull planes, and how to harness atmosphere to give your images a palpable sense of space.
This article provides a structured path to mastering this cinematic vision. We will deconstruct the fundamental principles of light, lens choice, and atmosphere, providing you with the tools to transform your flat photographs into immersive, three-dimensional worlds. Each section builds upon the last, moving from foundational lighting techniques to advanced atmospheric and color-grading strategies.
Contents: How to Master Volumetric Storytelling in Photography
- Why Does Backlighting Create Immediate Separation from the Background?
- How to Use Warm/Cool Color Contrast to Push Depth Perception?
- Telephoto Compression vs. Wide Angle Expansion: Which Feels Deeper?
- The On-Camera Flash Mistake That Flattens Faces Instantly
- How to Layer Foreground, Midground, and Background for Max Depth?
- Why Is Blue Hour the Best Time for capturing Natural Haze?
- How to Color Grade Highlights and Shadows Independently?
- What Defines an Investment-Grade Creation in the Current Art Market?
Why Does Backlighting Create Immediate Separation from the Background?
Backlighting is the most potent tool for instantly creating depth because it achieves something fundamental: it separates the subject’s form from its environment. When a light source is placed behind a subject, it outlines their shape with a brilliant edge, often called a rim light. This effect doesn’t just illuminate the subject; it carves them out of the background, creating a distinct visual layer. The human eye is exquisitely sensitive to edges, and this high-contrast border screams “separation.” It tells the brain that there is physical space between the subject and whatever lies behind them. This is why cinematographers and photographers utilize it to prevent an image from falling flat.
Unlike frontal lighting which reveals texture and color, backlighting reveals form and volume. It emphasizes the subject’s silhouette, making their three-dimensional presence undeniable. This technique can bring out shapes, textures, and contours, making an image feel more lively and dynamic. The key is that the light is tracing the edge of the volume itself, giving the viewer a powerful cue about the object’s dimensionality. The glow from the backlight can also wrap around the subject, creating a halo effect that further enhances this sense of separation, as if the light itself is occupying the space between the layers.
How to Use Warm/Cool Color Contrast to Push Depth Perception?
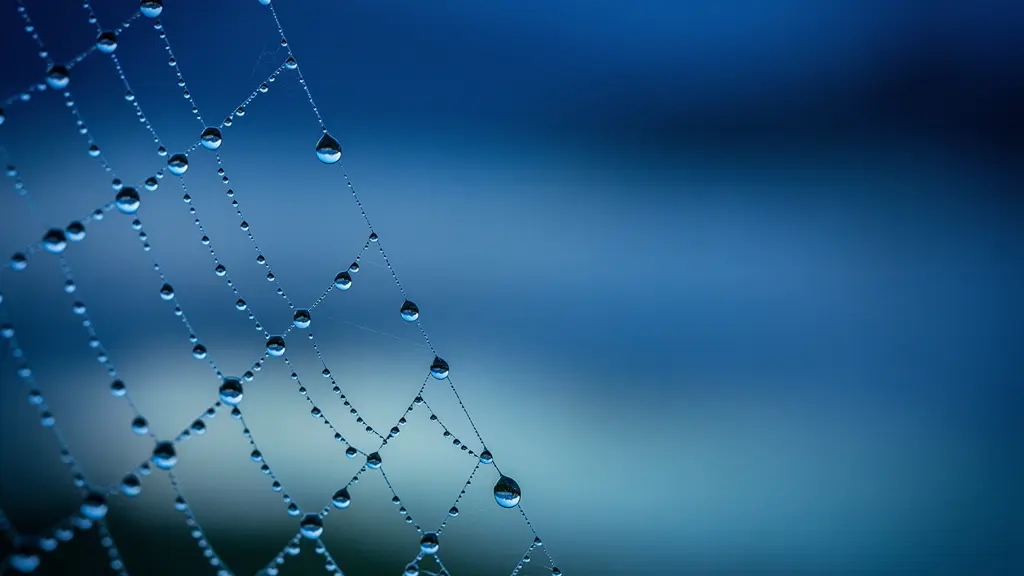
Color is not merely decorative; it is a powerful spatial tool. Our brains are hardwired to interpret colors in a spatial way, a phenomenon rooted in atmospheric perspective. In nature, distant objects like mountains appear bluer and less saturated due to the scattering of light by the atmosphere. As a result, we perceive cool colors (blues, cyans, cool greens) as receding into the distance. Conversely, warm colors (reds, oranges, yellows) feel closer and more immediate, like the warm glow of a campfire. By strategically placing warm and cool tones within your frame, you can manipulate this psychological shortcut to create a profound sense of depth.
Imagine a scene where the foreground is lit by the warm, golden light of a candle, while a window in the background reveals a cool, blue twilight cityscape. This immediately establishes two distinct spatial planes. The warm elements seem to advance toward the viewer, while the cool background recedes, creating a push-pull effect that stretches the perceived distance within the image. This technique is a favorite of master cinematographers like Roger Deakins, who consistently uses volumetric lighting and color temperature to add dimension. He understands that directing a light source toward or away from the camera, combined with color contrast, creates far more depth than simple side lighting. You are no longer just lighting subjects; you are painting with temperature to build a layered, three-dimensional world.

As this image demonstrates, the warm tones of the foreground objects make them feel tangibly close, while the cool blue light in the background pushes it far away, creating a convincing illusion of space. This isn’t just a filter; it’s a fundamental manipulation of human perception. This principle can be applied to lighting, wardrobe, set design, and color grading to enhance the feeling of volume in any scene.
Telephoto Compression vs. Wide Angle Expansion: Which Feels Deeper?
The choice of lens fundamentally alters the viewer’s perception of space, but the answer to which “feels deeper” is not straightforward. It depends on the *type* of depth you want to create. A wide-angle lens (e.g., 24-35mm) expands space. It exaggerates the distance between foreground and background, making the z-axis feel stretched and dramatic. This creates what can be called participatory depth, pulling the viewer into the scene and making them feel present within the environment. It’s an immersive, sometimes unsettling effect, excellent for establishing a world and the character’s place within it.
A telephoto lens (e.g., 85-200mm), on the other hand, compresses space. It flattens the planes, stacking the foreground, midground, and background on top of each other. This might sound like it reduces depth, but it creates a different kind, known as observational depth. It transforms the scene into a painterly composition of layered elements. This is perfect for isolating a subject while showing their relationship to a vast background, creating a graphic, textured feel. The viewer feels more like a distant observer, appreciating the composition of layers rather than being inside it.
As one expert notes, this distinction is crucial for a visual storyteller.
Wide-angle creates participatory depth making the viewer feel present, while telephoto creates observational depth for distant, painterly layer stacking.
– Film Studies Professor, Contemporary Cinematography Techniques
The following table, inspired by a recent analysis of lens characteristics, breaks down these distinct effects on depth perception.
| Aspect | Wide Angle (24-35mm) | Telephoto (85-200mm) |
|---|---|---|
| Depth Type | Participatory – immersive | Observational – painterly |
| Z-Axis Effect | Stretched, dramatic movement | Compressed, stacked layers |
| Best Use | Environmental context, unease | Subject isolation, patterns |
| Background Separation | Exaggerated distance | Flattened planes |
The On-Camera Flash Mistake That Flattens Faces Instantly
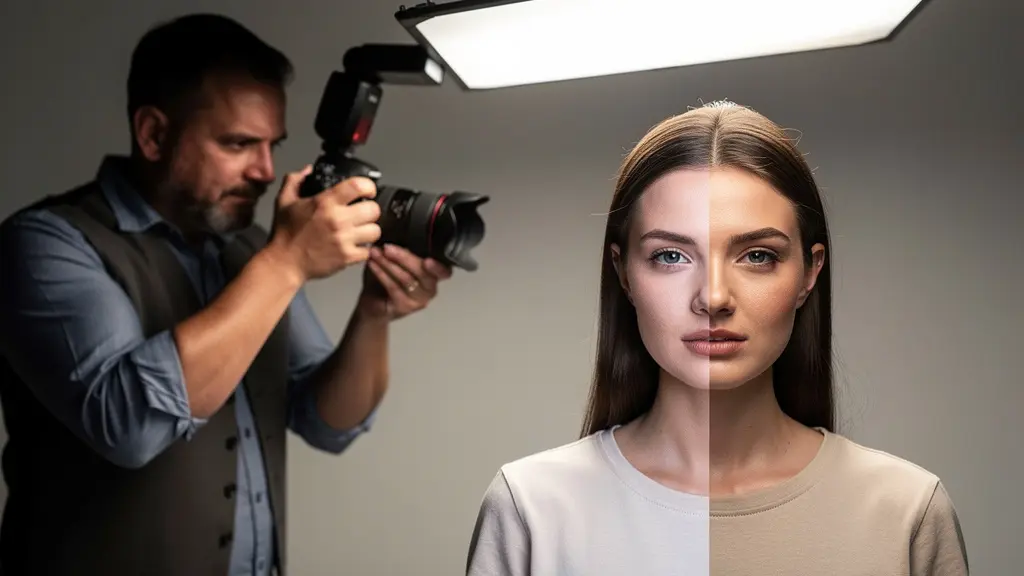
The single greatest mistake photographers make with on-camera flash is aiming it directly at the subject. This frontal, deer-in-the-headlights blast of light is the enemy of volume. It eliminates shadows, which are the essential cues our brains use to interpret three-dimensional form. A face lit frontally becomes a flat map of features, devoid of shape, contour, or depth. The light effectively steamrolls the natural curves of the cheeks, nose, and brow, resulting in a passport-photo aesthetic that feels lifeless and two-dimensional. The light source appears to be in the same plane as the camera, offering no information about the subject’s volume.
The solution is to get the light off the same axis as the lens. With a hot-shoe flash, this doesn’t mean you need a separate stand; it means you need to bounce the light. By angling the flash head towards a nearby surface—a ceiling or a wall—you transform that surface into a much larger, softer light source. Bouncing off a ceiling creates a gentle top-down light that mimics natural overhead lighting, sculpting the face with soft shadows under the chin and brow (classical “Rembrandt” lighting). Bouncing off a side wall creates directional light that models one side of the face while letting the other fall into shadow, creating drama and dimension. You are no longer blasting the subject; you are filling the room with a beautiful, soft light that wraps around them, revealing their form.
Your Action Plan: From Flat Flash to Sculpted Light
- Redirect the source: Aim your flash at a neutral-colored ceiling to create a soft, top-down light that elegantly models facial features.
- Create directional drama: Bounce the flash off a side wall to create directional light, carving out the subject’s form with highlights and shadows.
- Use a modifier: Attach a simple bounce card to your flash to redirect a portion of the light forward, filling in shadows while maintaining dimensional modeling from the bounced light.
- Soften the output: Place a small diffuser over the flash head. This increases the apparent size of your light source, creating softer-edged shadows and more pleasing transitions.
- Control your exposure: Intentionally underexpose your flash by -0.7 or -1 stop. This preserves highlight detail and creates richer shadows, which can then be gently lifted in post-production for a more cinematic look.
How to Layer Foreground, Midground, and Background for Max Depth?
Creating convincing depth through layering is about more than just placing an object in the foreground. It’s about building a coherent spatial world where each plane interacts with the others. The goal is to establish three distinct zones—foreground, midground, and background—and create visual relationships between them. The foreground acts as the viewer’s entry point, an anchor that establishes their position in space. The midground typically holds the primary subject or focal point of the narrative. The background provides context, world-building, and atmospheric depth.
The most effective technique for connecting these layers is occlusion, where one element partially blocks the view of another. A tree branch in the foreground that slightly covers a person in the midground provides an undeniable depth cue. The brain immediately understands that the branch is closer than the person. As a case study on cinematic depth explains, this works because you can see layers of air between foreground and background, and the partial occlusion forces the brain to construct the space. This sense of layering can be further enhanced by using focus. A sharp foreground with a soft background (or vice-versa) clearly separates the planes and directs the viewer’s attention through the scene.
To build these layers effectively, think in terms of the parallax effect: as the camera moves, closer objects appear to move faster than distant ones. You can simulate this feeling in a still image by creating strong overlapping elements. Place a foreground element like a window frame or foliage to serve as a static reference point. Position your subject in the midground, perhaps partially obscured by the foreground. Finally, ensure the background is not just a flat wall but has its own depth—a receding street, distant mountains, or atmospheric haze. This creates a composition that the eye can navigate, moving from one plane to the next, building a rich, three-dimensional experience.
Why Is Blue Hour the Best Time for capturing Natural Haze?
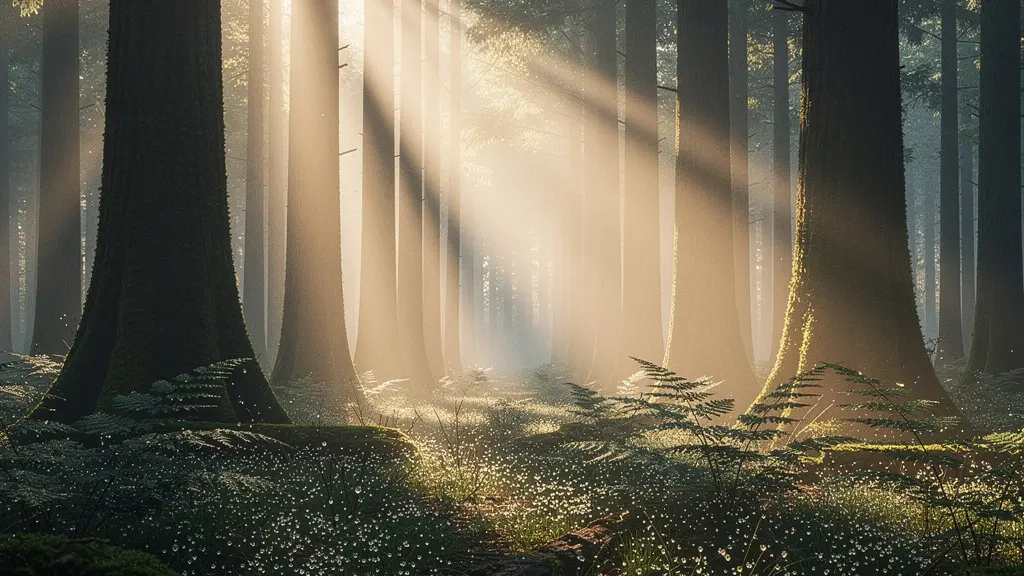
Blue hour—the period of twilight just before sunrise or after sunset—is the optimal time for capturing natural haze because of a specific atmospheric phenomenon combined with the unique quality of ambient light. The magic ingredient is the angle of the sun. When the sun is below the horizon, it is no longer directly illuminating the landscape. Instead, its light is scattered through the upper atmosphere. This is where Rayleigh scattering comes into play. Shorter, blue wavelengths of light are scattered far more effectively by the molecules in the air than longer, red wavelengths. In fact, atmospheric physics research demonstrates that blue wavelengths scatter about five times more than red ones during this period.
This intense scattering of blue light has two effects that are perfect for creating depth. First, it fills the shadows with a cool, blue ambient light, creating the very color contrast we discussed earlier. Second, and more importantly, it makes any particles in the air—dust, moisture, pollution—highly visible. The scattered blue light backlights the haze, causing it to glow and become a tangible, volumetric element in your scene. During midday, harsh overhead sunlight tends to “burn through” haze, making it invisible. But during blue hour, the soft, indirect light allows the atmosphere itself to become a subject, creating beautiful, distinct planes of separation between distant objects. A far-off mountain range will be fainter and bluer than a closer one, providing a perfect, natural gradient of depth.
This effect allows you to literally photograph the air. Each layer of haze catches the soft, scattered light differently, creating visible depth. You are not just capturing a landscape; you are capturing a volume of atmosphere, with each layer adding to the painterly, three-dimensional quality of the final image. This is the essence of using atmosphere to sculpt space.
How to Color Grade Highlights and Shadows Independently?
Color grading is your final opportunity to enhance and refine the volumetric depth you’ve carefully constructed in-camera. The most powerful technique for this is to control the color of your highlights, midtones, and shadows independently. This is often called split toning, and it allows you to amplify the natural color contrasts that create spatial separation. By decoupling the tones, you can push the warm/cool principle to its artistic limit, adding a warm hue to your highlights (mimicking sunlight) and a cool hue to your shadows (mimicking ambient skylight). This exaggerates the natural push-pull effect, making your image feel even more dimensional.
Most modern editing software (like Adobe Lightroom or DaVinci Resolve) offers dedicated color grading wheels or panels for this. The process involves more than just a blanket filter; it’s a targeted, surgical adjustment. For example, you can use luminosity masks to isolate only the brightest parts of your image and infuse them with a subtle gold or orange. Then, create another mask for the deepest shadows and tint them with cyan or blue. This ensures that a sunlit foreground character feels warmer and closer, while the shaded alleyway behind them feels cooler and more distant. The key is subtlety and reinforcement. You are not inventing color that wasn’t there; you are enhancing the natural color separation that already exists in the scene.
Beyond just highlights and shadows, you can use these tools to create color-depth relationships. For instance, you could grade the deep background to be slightly cooler and less saturated than the midground, further enhancing the effect of atmospheric perspective. This final-stage sculpting allows you to guide the viewer’s eye through the Z-axis of your image with precision, ensuring that every tonal range is working to support the illusion of a three-dimensional space. It is the last touch of the sculptor’s chisel, refining the form you’ve already created.
Key Takeaways
- Depth is sculpted, not arranged. Use light and atmosphere as your tools to carve out space.
- Every lighting and lens choice creates a different *type* of depth. Choose intentionally to evoke a specific feeling in the viewer—participatory or observational.
- Color and atmosphere are not afterthoughts; they are foundational elements of spatial storytelling. Master them to control the Z-axis of your frame.
What Defines an Investment-Grade Creation in the Current Art Market?
In the art market, an “investment-grade” creation is one that transcends mere technical proficiency to achieve a unique, inimitable artistic voice. This is where the preceding techniques converge. Mastering volumetric depth through light and atmosphere is not just a technical exercise; it is the very process by which a photographer develops a signature style and elevates their work from a simple record into a piece of fine art. The ability to sculpt space, to imbue a two-dimensional plane with a palpable sense of presence and emotion, is a rare and valuable skill. It is this rarity and intentionality that underpins artistic value.
An investment-grade photograph is rarely defined by its subject matter alone, but by its execution and the unique vision of the artist. The market values work that demonstrates a profound understanding of the medium. When a photographer can consistently use backlighting not just to separate a subject but to evoke a feeling of isolation or divinity, or use color contrast not just for depth but to tell a story of emotional conflict, they are no longer just a technician. They are an author. Collectors and gallerists look for this consistency of vision—a clear, recognizable style that is difficult to replicate. The techniques of volumetric sculpting are the building blocks of that style.
Ultimately, a photograph becomes an investment when it offers a perspective that is both timeless and singular. The mastery of light, atmosphere, and layering is what allows an artist to transform an ordinary scene into an extraordinary experience. It demonstrates a commitment to the craft that goes far beyond the press of a shutter button. It is the evidence of countless hours spent understanding not just the *what*, but the profound *why* of creating an image. This depth of intent is what the art market recognizes, and what turns a creation into a lasting asset.
Begin today to see your scenes not as flat surfaces, but as deep, breathable volumes of space waiting to be sculpted by your vision and your light.