
Achieving absolute color consistency across a large series isn’t about buying the most expensive strobe, but mastering a technical protocol that controls power stability and thermal drift.
- Stable power, whether from a regulated battery or clean AC source, is the foundation of consistent color temperature.
- High-Speed Sync (HSS) is often a trap for consistency, introducing significant power and color variance. True motion-freezing comes from short flash duration, not shutter speed.
Recommendation: Build a workflow based on a “hierarchy of light” setup, disciplined recycle times, and methodical power testing to make consistency a predictable outcome, not a matter of luck.
For commercial photographers transitioning into the fine art world, the standards for technical excellence are unforgiving. While a single commercial shot can be perfected in post-production, a fine art series of 500 prints demands absolute, unwavering consistency from the first frame to the last. The slightest variation in color temperature or power output can devalue an entire edition. Many photographers believe the solution lies in purchasing premium-tier strobes, hoping that a high price tag guarantees reliability. Others rely on post-shoot calibration with a colorimeter, a corrective measure that admits a failure in the capture process.
The common advice revolves around specific brands or post-production fixes, but these approaches miss the fundamental point. They treat the symptoms of inconsistency rather than curing the cause. The truth is that even mid-tier equipment can deliver flawless results when operated within a disciplined framework. The real key to shot-to-shot and series-to-series consistency is not the logo on the strobe, but the photographer’s mastery of the underlying physics of flash photography.
This guide abandons brand-centric debates to focus on the one thing that truly matters: the creation of a robust reliability protocol. We will dissect the technical principles—from the nature of the power source to the science of flash duration and the methodology of multi-light setups. Instead of a shopping list, you will gain a workflow consultant’s perspective on how to engineer consistency into your process, ensuring that every single shot in your series is a perfect match for the one before it.
This article provides a comprehensive framework for understanding and mastering the technical elements that ensure strobe consistency. Explore the detailed sections below to build your own reliability protocol.
Summary: A Technical Guide to Strobe and Color Consistency
- Why Is Short Flash Duration Critical for Freezing Liquid Art?
- How to Sync Strobes at High Shutter Speeds Without Banding?
- Battery or AC: Which Strobe System Fits a Traveling Fine Art Photographer?
- The Rapid-Fire Mistake That Burns Out Flashtubes Instantly
- In What Order Should You Set Up a 4-Light Strobe Scenario?
- LED Panels or Strobes: Which Blends Better with Office Fluorescents?
- How to Use an Incident Light Meter to Nail Ratios Every Time?
- How to Balance Ambient Illumination with Flash for a Natural Look?
Why Is Short Flash Duration Critical for Freezing Liquid Art?
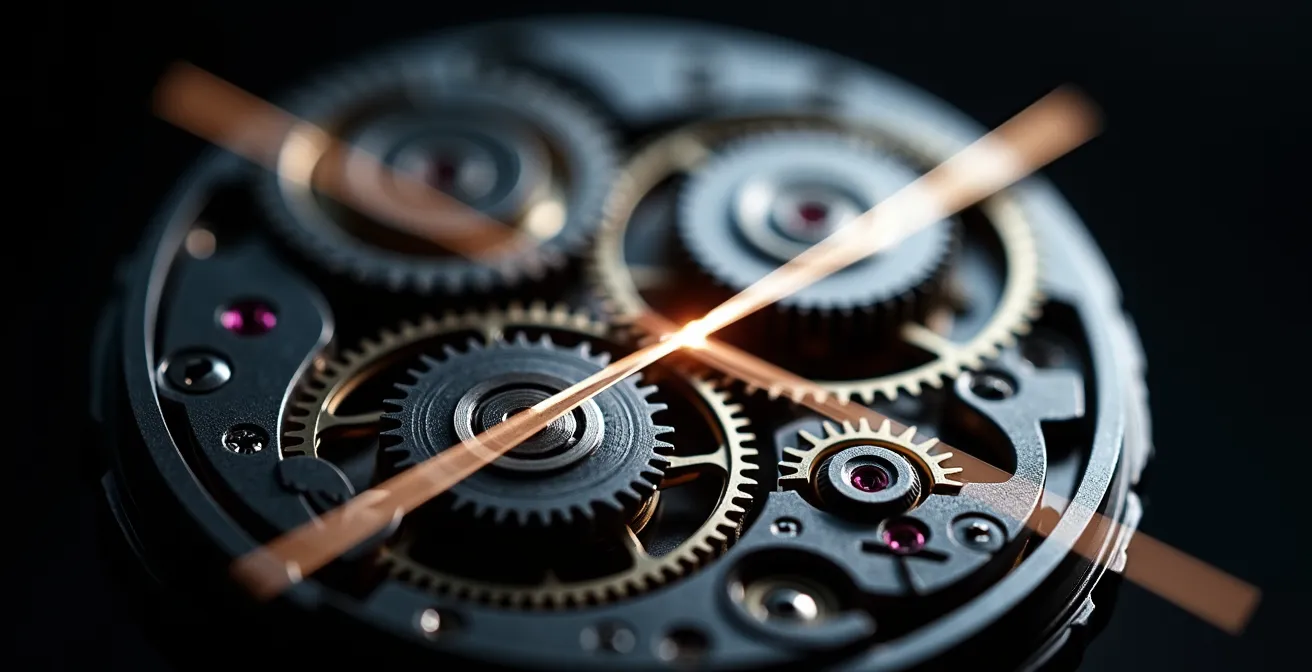
In high-concept fine art, especially involving dynamic elements like liquid splashes or falling powders, the ability to freeze motion with absolute sharpness is paramount. A common misconception is that a high shutter speed is responsible for this effect. In reality, in a controlled studio environment, it’s the flash duration—the length of time the flash tube is illuminated—that freezes the action. For a fine art series, a short flash duration is non-negotiable not just for sharpness, but because it is intrinsically linked to power consistency.
To understand this, we must differentiate between the two industry metrics: t0.5 and t0.1. The t0.5 measurement indicates the time it takes for the flash to discharge 50% of its power, while t0.1 measures the time to discharge 90%. For freezing motion without any blur, the t0.1 value is the only one that matters, as the remaining “tail” of light in a t0.5 measurement can still cause ghosting. Critically, t0.1 is approximately three times longer than t0.5, a significant difference. Professional work, like Karl Taylor’s liquid splash photography, often requires flash durations of 1/5000s to 1/10000s (t0.1) to completely freeze a water splash, a speed achieved by using strobes at lower power settings where the duration is shortest.
Strobes that boast short flash durations at various power levels are engineered for a faster, more complete energy discharge. This engineering precision often leads to better shot-to-shot power consistency, as the capacitor’s discharge cycle is more controlled and repeatable. Therefore, prioritizing a strobe with excellent t0.1 specifications is a foundational step in building a reliability protocol for your fine art production.
Ultimately, selecting a unit based on its t0.1 performance across its power range provides a dual benefit: creative control over motion and a technical foundation for the color consistency required in a demanding series.
How to Sync Strobes at High Shutter Speeds Without Banding?
The need to shoot with a wide aperture outdoors or to overpower the sun often pushes photographers towards High-Speed Sync (HSS). However, for a fine art photographer demanding absolute consistency, HSS is a technical trap. HSS works by emitting a series of rapid, low-power light pulses instead of a single burst, effectively turning the strobe into a continuous light for the brief moment the shutter travels across the sensor. This pulsing mechanism is the very enemy of consistency.
The primary issue is a significant and often variable power loss. Technical analyses show that HSS mode can result in a 50-75% power loss compared to a normal flash sync. This loss is not always linear or predictable, leading to fluctuations in exposure and, more critically, color temperature from shot to shot. The strobe is working harder and generating more heat, which can introduce thermal drift in the color output over a long series. Banding, the appearance of dark bars across the image, occurs when the timing of these pulses is imperfectly aligned with the shutter’s movement.
A more reliable alternative for syncing above the camera’s native x-sync speed is HyperSync or “long tail sync,” a technology pioneered by brands like PocketWizard. Instead of pulsing, HyperSync precisely times a single, full-power flash burst to fire just as the first shutter curtain opens and remain on as the second curtain closes. While it requires fine-tuning, this method avoids the power loss and color instability inherent to HSS.
| Trigger Brand | HSS Method | Max Sync Speed | Power Loss | Color Stability |
|---|---|---|---|---|
| PocketWizard | HyperSync/Long Tail | 1/8000s | Minimal | Excellent |
| Godox | Pulsed HSS | 1/8000s | 75% loss | Variable |
| Profoto | Air TTL HSS | 1/8000s | 50-75% loss | Good in normal mode |
For the fine art photographer, the choice is clear: avoid pulsed HSS whenever possible. If high shutter speeds are essential, invest in a trigger system that supports a HyperSync-style technology to maintain the power and color integrity that a series demands.
Battery or AC: Which Strobe System Fits a Traveling Fine Art Photographer?
The choice between battery-powered and AC-powered strobes is often framed as a simple trade-off between portability and unlimited power. For the traveling fine art photographer, however, the decision has deeper implications for consistency. The critical factor is not the source of the electricity, but its stability. Power fluctuations from wall outlets, especially in older buildings or remote locations, can introduce subtle but damaging shifts in flash output and color temperature over a 500-shot series.
This is where modern battery systems offer a distinct advantage. High-quality battery packs provide regulated, “clean” power to the strobe’s capacitors. They act as a buffer, isolating the delicate electronics from the unpredictable voltage of the grid. As one technical analysis from a studio lighting forum notes, this creates a more stable electrical environment.
Battery-powered strobes offer superior color consistency because they provide ‘clean’ power, isolating the unit from unpredictable and fluctuating voltage of outlets in various locations.
– Technical analysis from studio lighting forums, DPReview Studio Lighting Discussion
This regulated output ensures that the capacitors are charged to the exact same level for every shot, which is the cornerstone of repeatable power delivery. While AC systems offer infinite shots, their consistency is only as good as the power grid they are plugged into. For a photographer shooting a critical series on location, the risk of “dirty” power is too great. The table below outlines the practical considerations beyond just power source.
| Feature | Battery Systems | AC Systems |
|---|---|---|
| Power Consistency | Regulated output throughout discharge | Depends on venue power quality |
| Weight | 3-5kg with battery | 2-3kg without power pack |
| Flight Restrictions | 100Wh limit for carry-on | No restrictions |
| Shots per Charge | 200-500 at full power | Unlimited |
Therefore, for a traveling artist whose work depends on flawless consistency, a high-quality, regulated battery-powered system is not just a convenience—it’s a critical component of their reliability protocol. It removes a major variable and gives the artist full control over their most important tool: light.
The Rapid-Fire Mistake That Burns Out Flashtubes Instantly
A flashtube is a consumable component, but its lifespan can be drastically shortened by a single, common workflow mistake: shooting faster than the strobe’s recycle time. While the audible “beep” signals that the capacitor is mostly recharged, it does not mean the unit is fully rested and thermally stable. Firing the instant the beep sounds, especially in rapid succession, is a recipe for inconsistency and premature failure. This lack of recycle discipline is a primary source of problems in long photo series.
Each time a strobe fires, it generates an immense amount of heat. If the next flash is triggered before this heat has had a chance to dissipate, the internal temperature of the flash head rises. This phenomenon, known as thermal drift, directly affects the color temperature of the light. A hotter tube produces a warmer light, introducing a gradual but noticeable color shift over the course of a shoot. In extreme cases, the rapid heat buildup can cause the flashtube to warp or even shatter.
A disciplined workflow is the only protection. This involves waiting a full second or two *after* the recycle beep before taking the next shot. For very rapid sequences, the best practice is to alternate between two or more strobe heads, giving each one adequate time to cool. Furthermore, professional usage reports indicate that strobes fired below 75% power with proper cooling can exceed 100,000 flashes without significant color shift. Keeping power levels moderate and monitoring the physical temperature of the strobe housing are essential practices.
For the fine art photographer, this isn’t about being slow; it’s about being methodical. Respecting the thermal limits of the equipment is not a suggestion but a requirement for achieving the flawless consistency that defines professional-grade work. It’s a core tenet of the reliability protocol.
In What Order Should You Set Up a 4-Light Strobe Scenario?
A multi-light setup can quickly descend into chaos without a systematic approach. Randomly turning on lights and adjusting them until “it looks right” is a process based on guesswork, not precision. For a repeatable fine art series, the setup must be built on a Hierarchy of Light. This method transforms lighting from an art of chance into a science of control, ensuring every light has a specific job and can be precisely metered and adjusted.
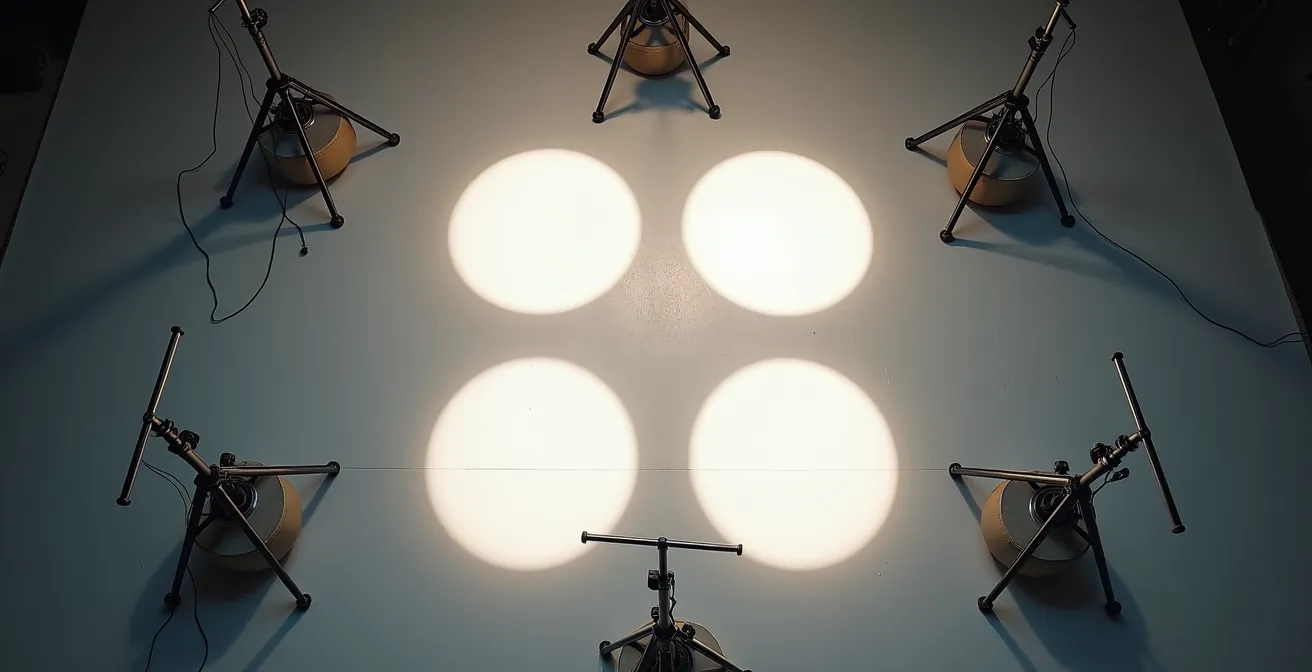
The process is methodical, as demonstrated in professional methodologies like The Slanted Lens’ “walk-in method.” You start with all lights off and build the scene one light at a time, evaluating each one’s contribution individually before adding the next. This ensures you understand exactly what each light is doing and prevents lights from contaminating each other’s effects. The key is to assign each light to a separate group on your wireless trigger, allowing for fine-tuning from the camera position without having to physically move around the set.
This structured approach is not just about efficiency; it’s about repeatability. By documenting the role, power level, and metered reading of each light in the hierarchy (Key, Rim, Fill, Background), you create a blueprint that can be perfectly replicated for subsequent shoots in the series. It removes ambiguity and makes consistency a deliberate act.
Your Action Plan: Implementing the Hierarchy of Light Audit
- Key Light First: Set up and meter your main light. This light defines the form and texture of your subject. Take a test shot. This is your baseline reading.
- Isolate and Add Rim Light: Turn off the key light. Add your rim/hair light(s) to separate the subject from the background. Meter them, aiming for about +1 stop over the key light reading. Take a test shot with only the rim light active.
- Introduce Fill Light: Turn off all other lights. Add your fill light to control contrast in the shadows. Meter it to be -1.5 to -2 stops below the key light reading. Test it in isolation.
- Set Background Light: With all other lights off, adjust the background light to achieve the desired separation and mood. Meter its brightness relative to the subject.
- Final Combination and Ratio Check: Turn all lights on. Take a final shot and use your incident meter to confirm the ratios between each light source are exactly as intended. Adjust individual groups remotely as needed.
By adopting this hierarchical method, the photographer moves from being a light “guesser” to a light “architect,” building a scene with intention and the ability to reproduce it flawlessly 500 times over.
LED Panels or Strobes: Which Blends Better with Office Fluorescents?
When shooting in mixed-lighting environments, such as an office with fluorescent overheads, the goal is to create a seamless and natural blend. The choice between LED panels and strobes is critical, and the decision rests on a technical specification: the Color Rendering Index (CRI). CRI measures a light source’s ability to accurately reproduce the colors of an object compared to a natural light source. A higher CRI means a fuller, more accurate spectrum of light.
Strobes inherently possess a significant advantage here. A flash tube produces a brief but very intense, full-spectrum burst of light that is very close to daylight. According to professional lighting equipment specifications, high-quality strobes consistently maintain a CRI of 95 or higher. This full-spectrum output makes them easier to balance with other light sources using gels. Because their light is “complete,” you can filter it (e.g., with a CTO or CTB gel) to match the ambient light without losing color information.
LEDs, by contrast, create light by combining red, green, and blue diodes. Even high-quality bi-color or RGB panels can have gaps in their light spectrum, resulting in a lower CRI that can vary from 85 to 95. When you try to gel a light source with an incomplete spectrum, you can exacerbate color casts, particularly in skin tones, which may appear muddy or unnatural. The dreaded green or magenta spikes common in cheaper LEDs and fluorescent lights are a result of these spectral gaps. Strobes, with their continuous, smooth spectrum, provide a cleaner canvas for color correction with gels, ensuring a more natural and consistent blend.
For the fine art photographer, whose work is judged on the subtlety and accuracy of its color palette, the superior, full-spectrum output of a strobe is the more reliable choice for blending with problematic ambient light sources.
How to Use an Incident Light Meter to Nail Ratios Every Time?
A camera’s built-in meter measures reflective light, which is easily fooled by the tone of a subject. An incident light meter, however, measures the light *falling on* the subject, providing an objective, repeatable exposure value regardless of whether the subject is black, white, or grey. For establishing precise lighting ratios in a multi-light setup, it is an indispensable tool of the reliability protocol. It removes all guesswork and subjectivity.
The process begins by measuring each light individually. With the meter at the subject’s position and pointed towards the key light, take a reading. This becomes your baseline. Then, turn off the key light and measure the fill light, adjusting its power until you achieve the desired ratio (e.g., a 2:1 ratio means the fill is one stop less powerful than the key). This is repeated for every light in the setup—rims, background, etc. The meter allows you to build a lighting scene based on pure mathematics, not just feel.
Furthermore, advanced meters are crucial for verifying the consistency of the strobes themselves. A professional testing protocol, for instance, involves taking 10 rapid shots while measuring with a meter like a Sekonic C-800 to detect flash-to-flash deviation. These tests show premium strobes maintaining a tight ±0.1 stop consistency, while budget options may vary by as much as ±0.3 stops—a significant difference in a critical series. The meter reveals the true performance of your gear.
| Measurement Type | Best Use | Accuracy | Ratio Building |
|---|---|---|---|
| Incident at Subject | Key light setup | ±0.1 stop | Primary reference |
| Spot on Background | Background separation | ±0.2 stop | Relative to key |
| Flash Percentage Mode | Ambient contamination check | Shows exact mix | Diagnoses color issues |
| Multiple Position Mapping | Modifier evenness | Identifies fall-off | Ensures consistency |
By trusting the objective data of an incident meter over the subjective view in the camera’s viewfinder, the photographer establishes a lighting setup that is not only perfectly exposed but also precisely documented and 100% repeatable for every shot in the series.
Key Takeaways
- True consistency comes from a disciplined technical protocol, not expensive gear alone.
- Flash duration (t0.1), not shutter speed, is what freezes motion and is a key indicator of a strobe’s discharge precision.
- A systematic, one-light-at-a-time setup using a “Hierarchy of Light” is essential for repeatable, complex lighting scenarios.
How to Balance Ambient Illumination with Flash for a Natural Look?
Once you have achieved mastery over the consistency of your strobes, the final step is to integrate that controlled light seamlessly with the unpredictable nature of ambient illumination. Achieving a “natural look” is not about simply adding a puff of fill flash; it’s a delicate balancing act governed by the physics of exposure. The key is to think of the scene in layers, a concept often referred to in advanced lighting techniques as the Three-Layer Theory. Your exposure is built from an ambient foundation, a key light for definition, and accent lights for separation.
The control mechanism is simple but powerful: shutter speed controls the ambient light exposure, while aperture and flash power control the flash exposure. To create a natural balance, you start by metering the ambient light. Set your camera to underexpose the ambient by 1 to 2 stops using your shutter speed—this creates the foundational mood without letting the ambient light dominate. For example, you might “drag the shutter” to a slower speed like 1/60s or 1/30s to allow more of the ambient warmth to register.
Next, you introduce your strobe, controlled by aperture and its power setting. The flash should be used subtly, often as a broad, soft source (like a large, heavily diffused softbox) to mimic natural light. Its purpose is to gently lift the shadows and add definition to the subject, not to overpower the scene. By setting the flash power at or even slightly below the ambient reading, you ensure it blends in, adding dimension without screaming “I used a flash!” This methodical approach, where each layer of light is controlled by a separate, specific setting, allows for an infinite range of creative and natural-looking results.
Mastering this balance is the ultimate expression of a photographer’s control. It demonstrates that you can not only create perfect, consistent light from your strobes but also make that artificial light live in harmony with the real world, elevating your work to the highest level of fine art.